
Setup and Configure Copay Service Type
To ensure accurate copay determination based on eligibility data, Copay Service Types must be properly configured at both the practice and provider levels. This setup enables the system to align copay values with payer-defined service categories and apply them correctly during patient check-in.
There are two steps required to configure the Copay Service Type:
- Contact your account manager to enable and define available Copay Service Types for your practice.
- Assign the appropriate Copay Service Type per provider based on their services.
Assign Copay Service Type to Providers in EHR
STEPS
- Login to EHR
- Navigate to: Administration → Resource Management → Resource Setup
- Search for and select the name of the provider
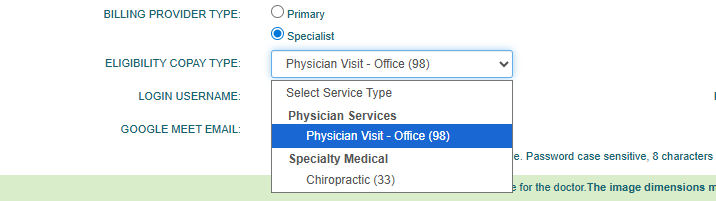
- On the General tab, locate the Eligibility Copay Type dropdown (placed under the Billing Provider type)
- Select the applicable service type of the provider, then Save changes.
Note
When the Eligibility Copay Type is not configured, or when the eligibility (271) response does not align with the selected service type, the copay will default to the amount associated with the provider’s Billing Provider Type (Primary or Specialist).
GO TO
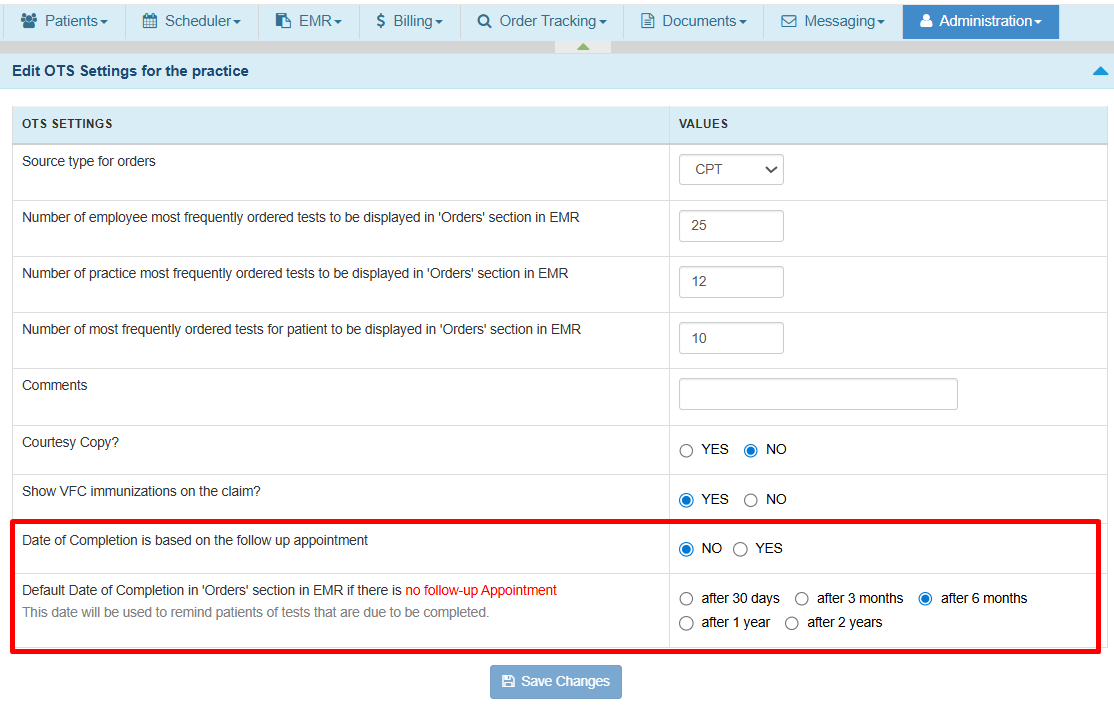
Administration → Order Tracking Setup → Edit Practice OTS Settings
STEPS
- Locate the setting Date of Completion is Based on Follow-Up Appointments.
-
Select one of the following options:
Yes:
When a follow-up appointment is linked to the order, the system calculates the Expected DOC based on the follow-up appointment date minus the configured offset (Days, Weeks, or Months). This helps ensure tests or procedures are completed before the follow-up visit.
Clinical Example
Follow-up Appointment Date: March 30
Configured Offset: 2 Weeks Before
Expected Completion Date: March 16No:
Expected DOC will always be calculated using the default completion timeframe regardless of whether a follow-up appointment exists.
Clinical Example
Follow-up Appointment Date: no effect
Order Created Date: February 16
Configured Offset: after 6 Months
Expected Completion Date: August 16 - Set the Default Date of Completion rule (for example: After X Days, Weeks, or Months). This rule is applied when:
- Expected DOC based on follow up is set to Yes (from Step 2) but No follow-up appointment exists, or
- The follow-up rule is disabled (No from Step 2).

Clinical Example
Order Created Date: February 16
Configured Offset: after 6 Months
Expected Completion Date: August 16 - Click Save to apply changes. The updated configuration will automatically apply to all new orders.
Where to Find the Expected Date of Completion (DOC)
The Expected DOC is displayed in the following workflows:
- When creating orders from the Orders and Procedures note
- When filtering orders from the Order Tracking page
For a complete walkthrough of both workflows, please refer to the full Order Tracking Management guide.
]]> /user-guides/billing/using-the-stripe-dashboard-in-the-ehr/ Fri, 30 Jan 2026 17:01:50 +0000 /?post_type=userguides&p=11191 Using the Stripe Dashboard in the EHRThe Stripe Dashboard within EHR lets you view and manage key Stripe account details—such as notifications, account settings, payments, payouts, disputes, and tax settings—without leaving the system.
STEPS
- Step 1 — Open the Stripe Dashboard
- Log into the EHR.
- Go to Administration → Billing Setup → Stripe Dashboard.
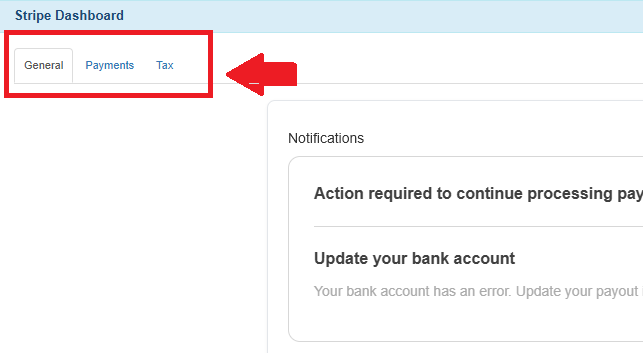
- When the dashboard loads, you will see three main tabs:
- General (Notifications, Account Management)
- Payments (Payments, Payouts, Disputes)
- Tax (Tax Settings, Tax Registrations)
→ Use the tabs at the top to switch between sections based on what you need to review or manage.

- Step 2 — Review the General Tab
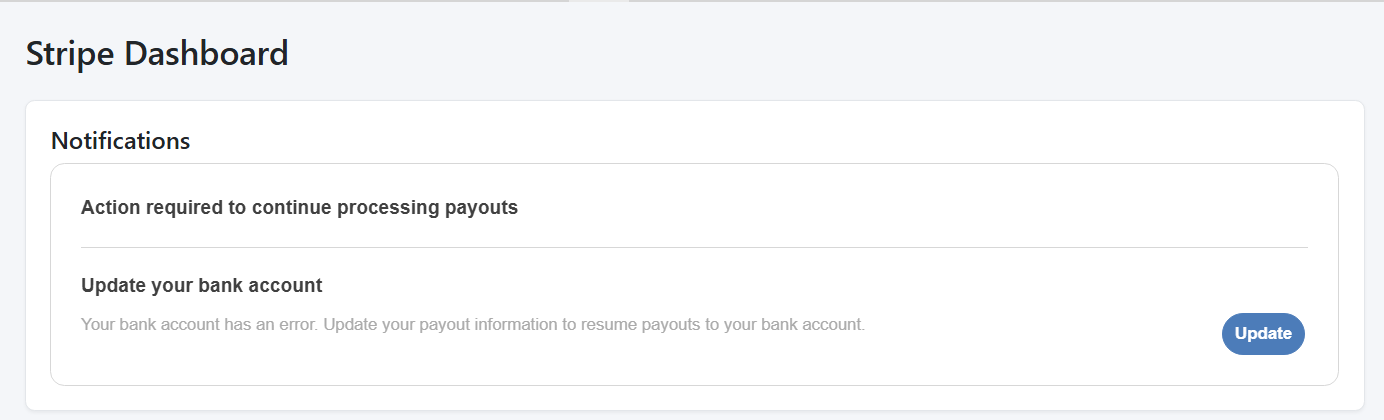
Notifications
The Notifications section displays important updates from Stripe, including:
- Payment failures
- Verification requirements
- Account alerts
- Payout delays
- Bank account or payout issues requiring updates
→ This is the first place to check if any action is required.
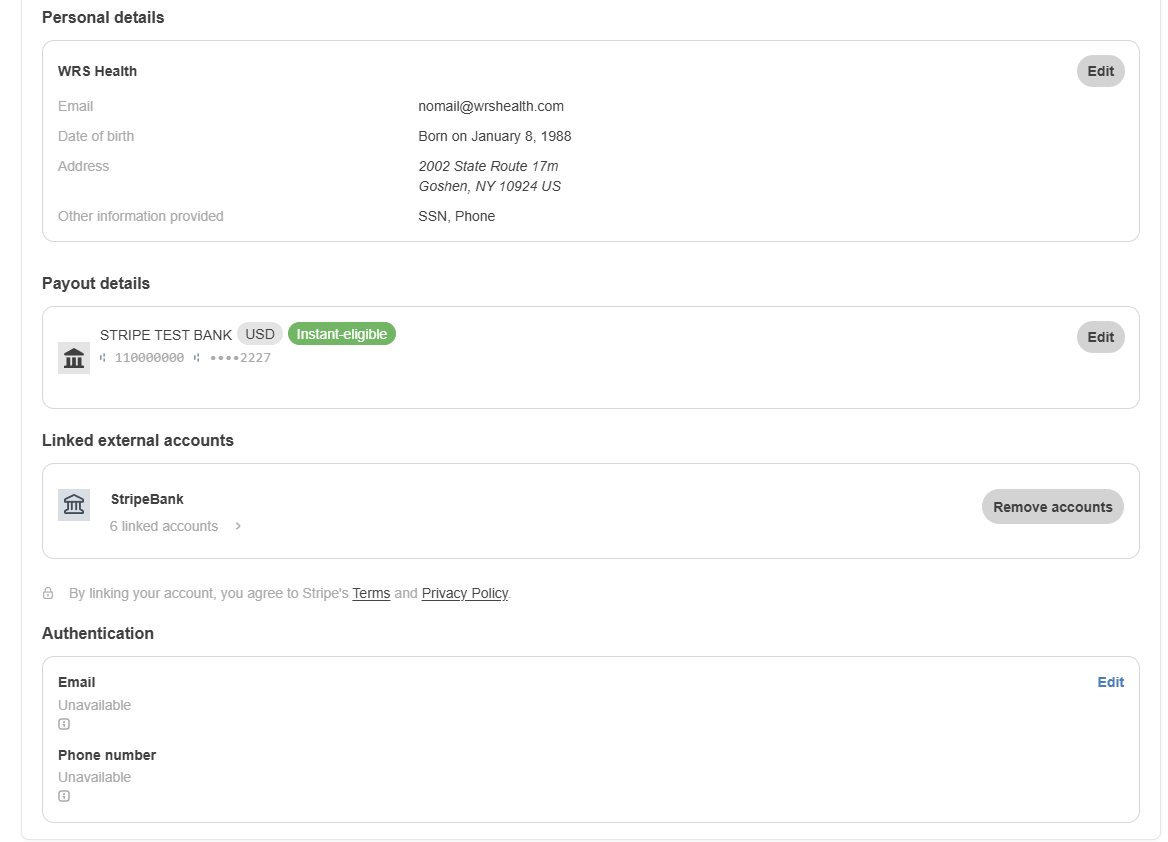
 Account Management
The Account Management section provides access to and allows management of:
- Business or practice information
- Personal and professional details
- Payout details
- Linked external accounts
- Authentication and security settings
Note: Management access is subject to your user role, permission level, and Stripe’s compliance and verification requirements. Some fields may be read-only.
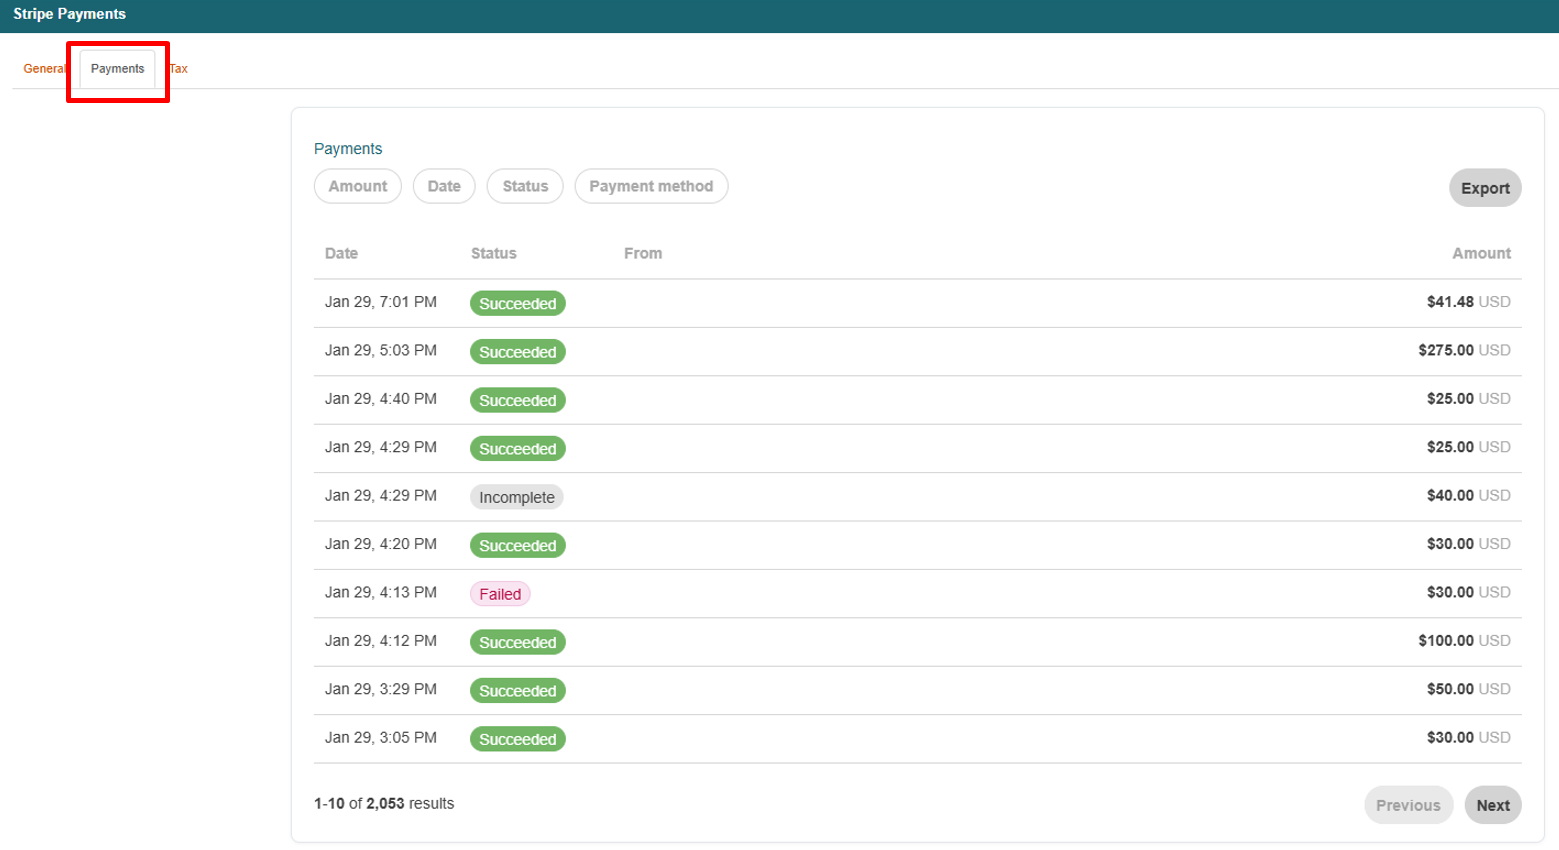
- Step 3 — Reviewing Payments tab
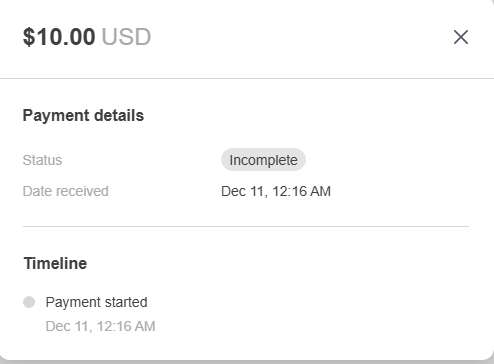
Payments
The Payments section shows all transactions processed through Stripe. You can view:
- Successful payments
- Failed or refunded transactions
- Patient or payer details
- Payment amounts
- Dates and payment methods
→ Use this section to track revenue, confirm processed charges, or investigate payment issues. Click any payment to view a detailed transaction timeline, including fees and balance impact.
→ Click into any payment to see a full transaction timeline, fees, and balance impact.
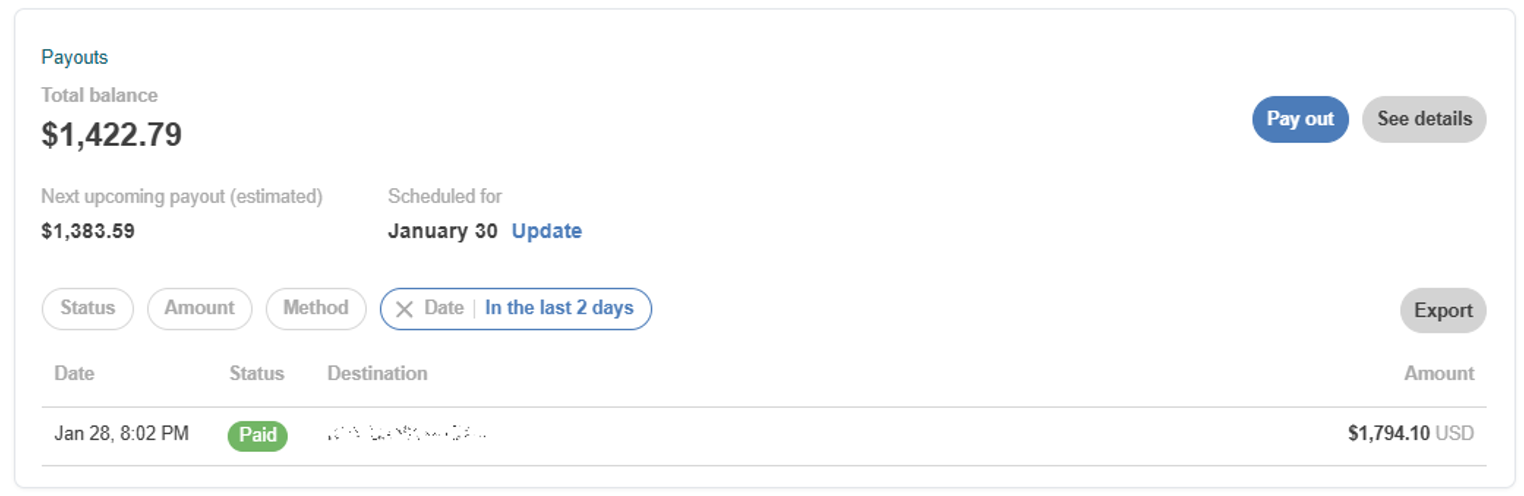
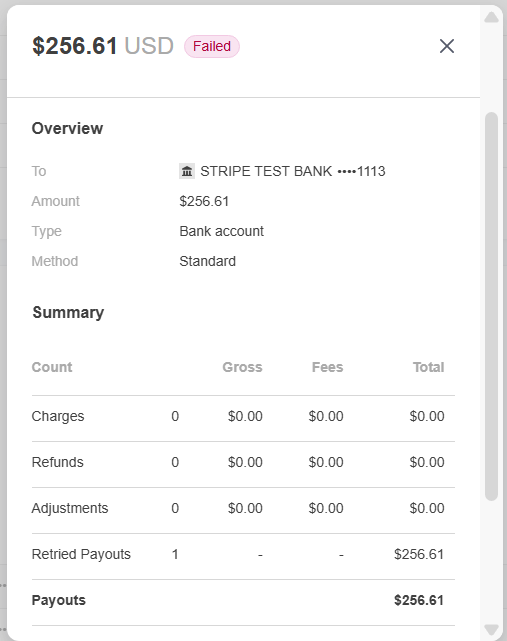
 Payouts
Payouts represent transfers from Stripe to your bank account. You can review:
- Upcoming payouts
- Completed payouts
- Amounts included in each payout
- Estimated arrival dates
→ Use this section to understand cash flow, reconcile deposits, and monitor when funds are expected to arrive.
→ Click a payout entry to view details.
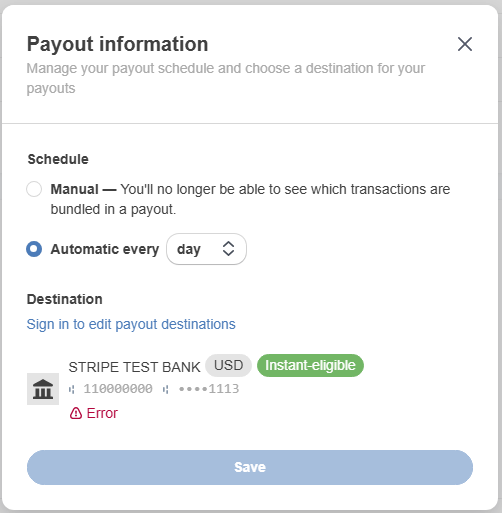
→ Click an entry to view details:

→ Use the available update options to adjust payout-related settings—such as payout schedule/timing or bank account details.
 Disputes (if available)
The Disputes section displays chargebacks or payment reversals initiated by a cardholder or financial institution. Use this section to:
- View dispute status and related transaction details
- Identify whether additional action or documentation is required
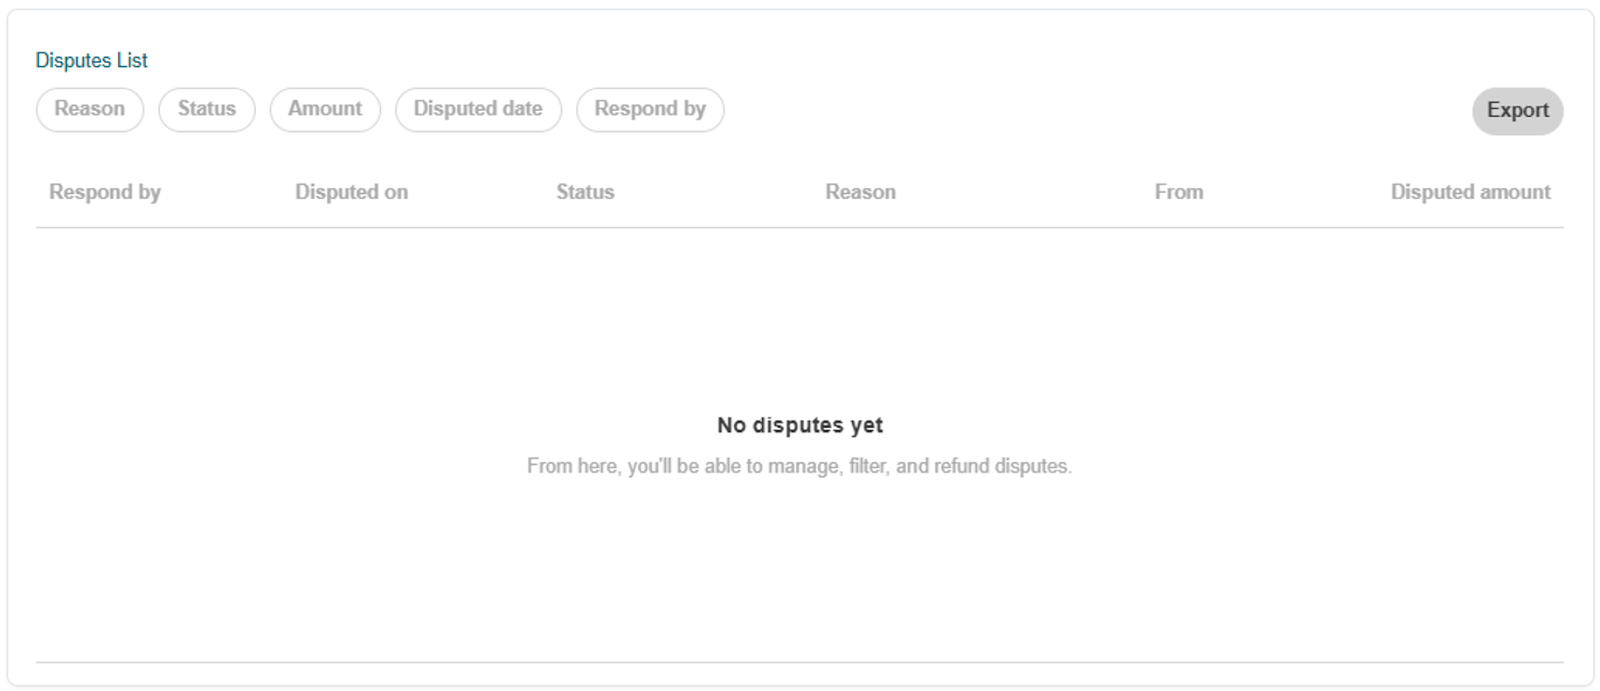
Note: This section may be empty if no disputes have occurred.
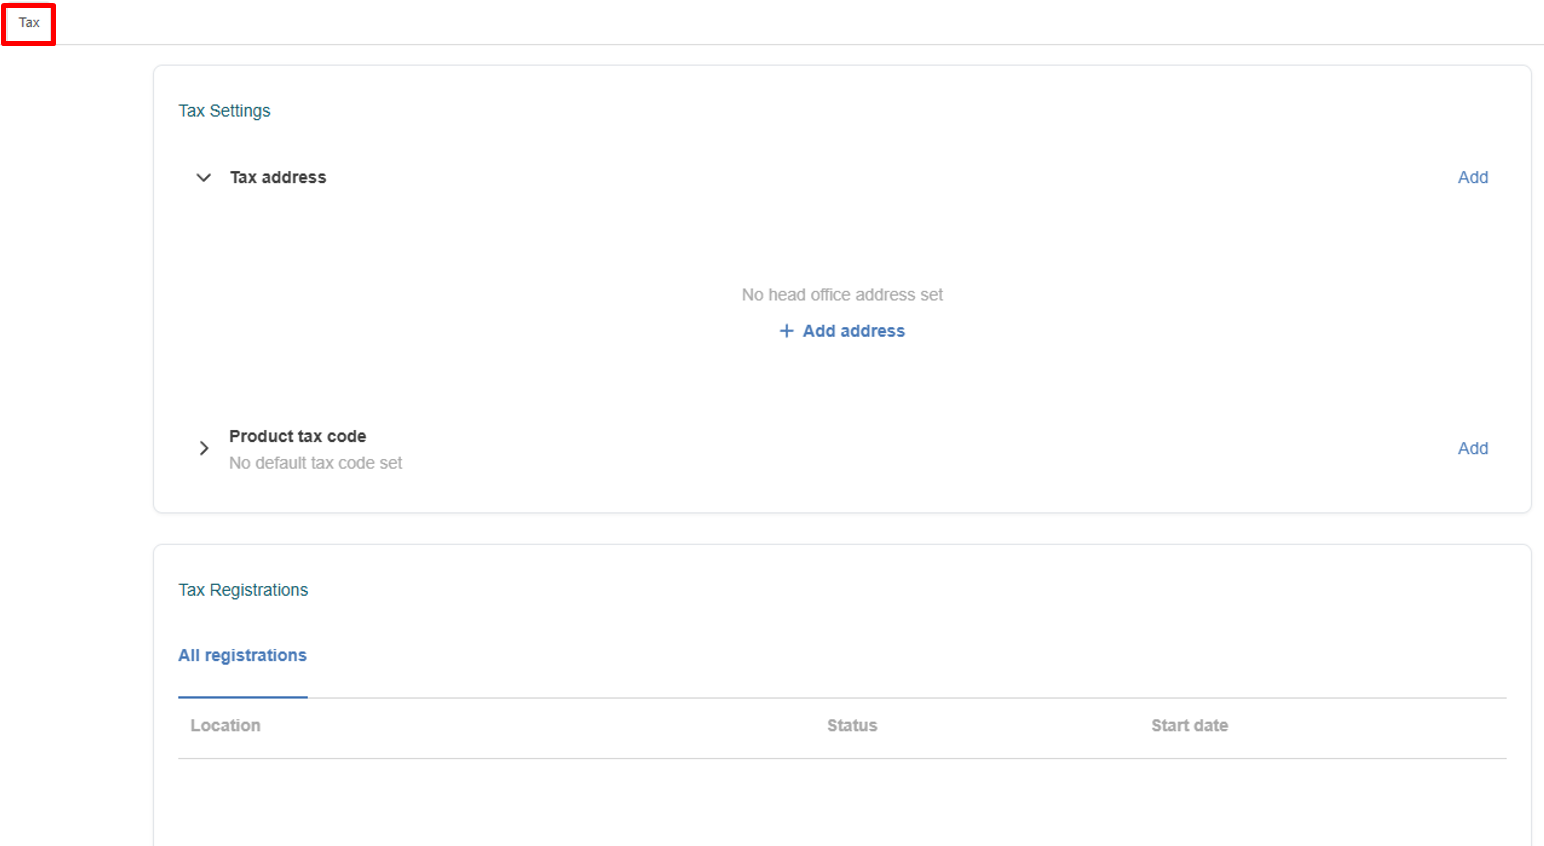
- Step 4 — Review Tax Settings (If Enabled)
The Tax tab includes Stripe’s tax-related components, such as:- Tax Settings
- Tax Registrations
→ Use this section to review tax configuration and support year-end reporting requirements, as applicable to your practice.

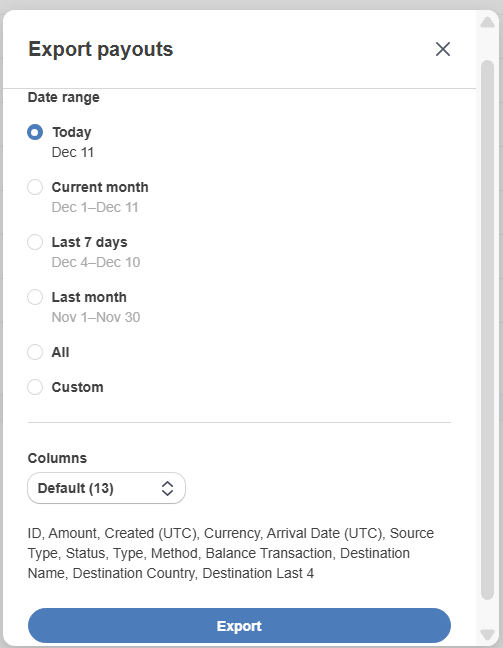
- Step 5 — Export to CSV (Optional)
If you need to analyze your data outside the Stripe Dashboard, you can export your Payments, Payouts, or other reports to a CSV file.To export:- Go to the section you want to download (e.g., Payments or Payouts).
- Click the Export button at the top right.
- Apply any filters you need—such as date range, status, or amount.
- Confirm the export.


Tips for Daily Use
- Check Notifications each day to catch issues early
- Use Payments to confirm patient balances or processed charges
- Review Payouts during reconciliation or month-end close
- Keep an eye on verification reminders to avoid payment disruptions
- Check Disputes regularly (if your practice accepts card payments)
- Review Tax tab when preparing year-end reporting (as applicable)
This guide explains how staff can process patient payments securely using ACH (Bank Transfer), allowing patients to pay directly from their bank account.
STEPS
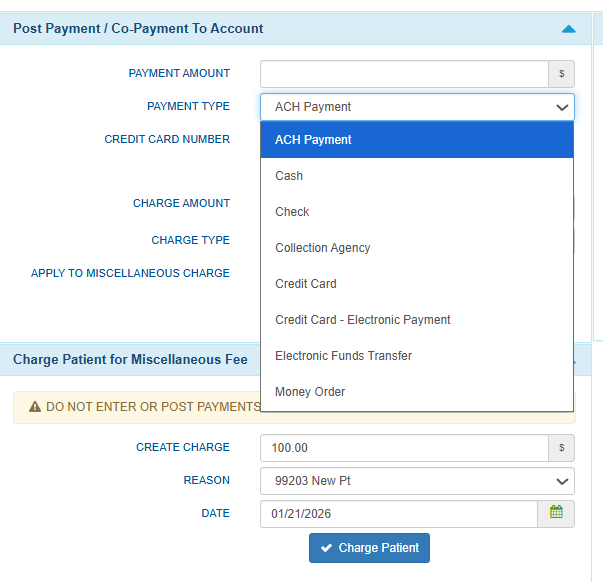
- Open the Patient’s Account page.
- Enter the Payment Amount.
- Select Payment Type → ACH Payment.

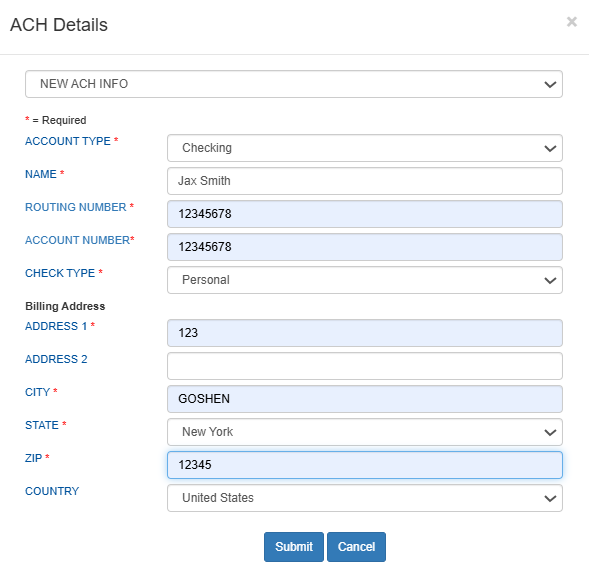
- Select ACH and enter bank details.
- From the payment method dropdown, select ACH (Bank Transfer).
- Enter the required bank information:
- Account Type (Checking or Savings)
- Account Holder Name
- Routing Number
- Account Number
- Check Type
- Billing Address
- Review details and Submit.
- Confirm Payment.
- Once submitted, the payment will appear in Patient Payments.

- Once submitted, the payment will appear in Patient Payments.
- Print Receipts (Optional).
- Click Print Receipt to provide a copy.
- Two receipts will be generated: Practice Copy and Patient Copy.


Notes
- ACH payments typically take 1–3 business days to process.
- Pending status: Payments may appear as Pending until processing is completed.
These guides outline how eligibility modifiers are configured at both at the practice and admin levels to support accurate and consistent 270 eligibility requests.
Configure Eligibility Modifiers in Admin
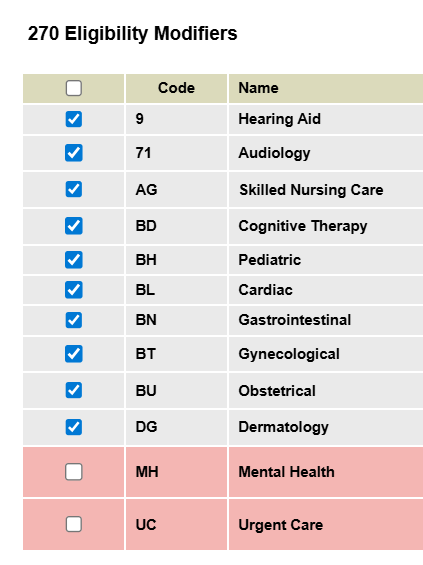
The 270 Eligibility Modifiers page allows system administrators to globally manage which eligibility service type codes are available for practices to use when checking insurance eligibility.
By enabling or disabling modifiers at the system level, admins control which benefit categories practices can select—ensuring consistency, compliance, and appropriate usage across the platform.
STEPS
- Log in to WRS Admin
- Navigate to Billing Management → 270 Eligibility Modifiers.
- You will see a list of all supported X12 service type codes available for eligibility requests.
- All service type codes are enabled by default when the page loads.
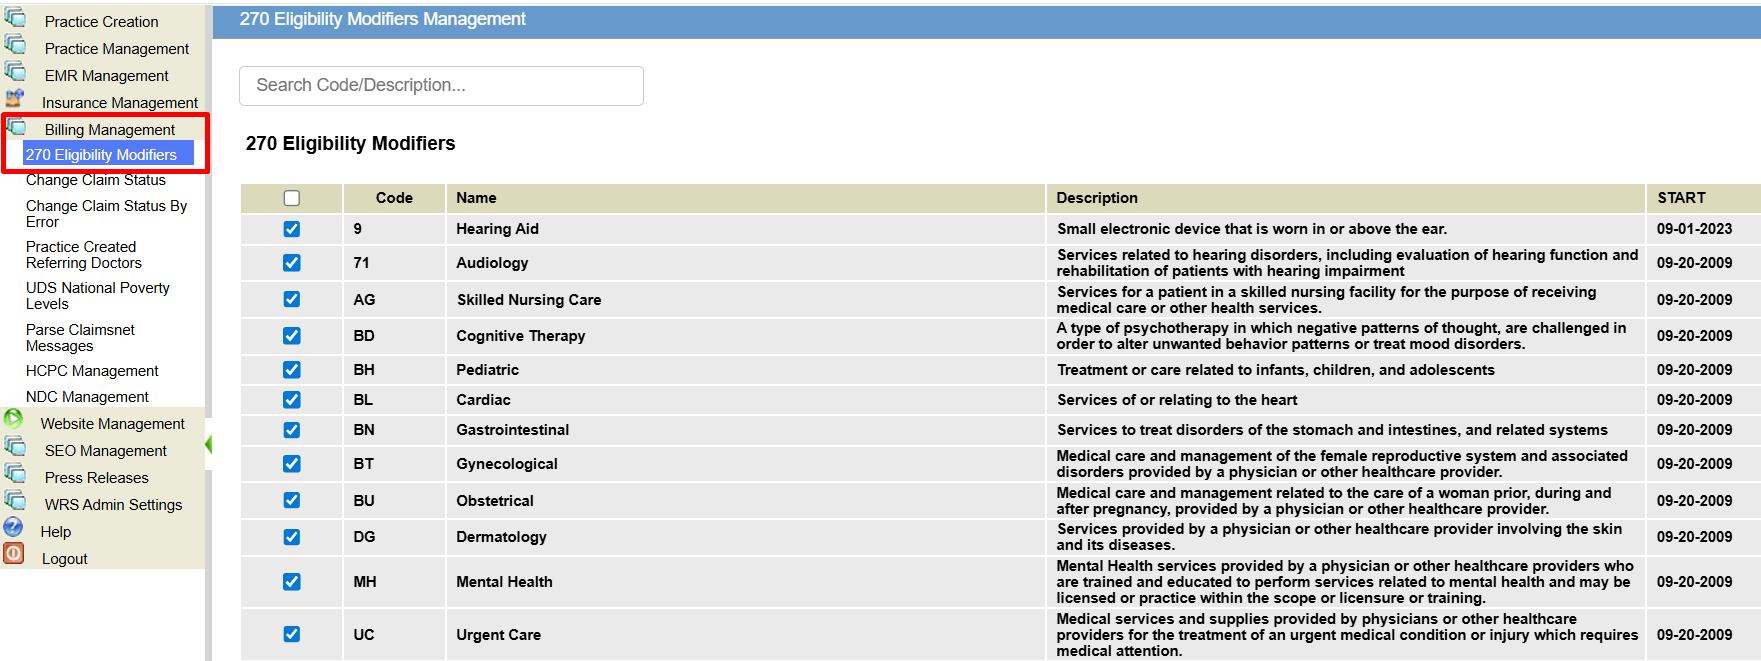
- Use the toggle or checkbox next to each service type code to enable or disable it globally.
- Enabled codes will be available for practices to select.
- Disabled codes will be hidden from practice-level configuration.


Selecting Eligibility Modifiers in EHR
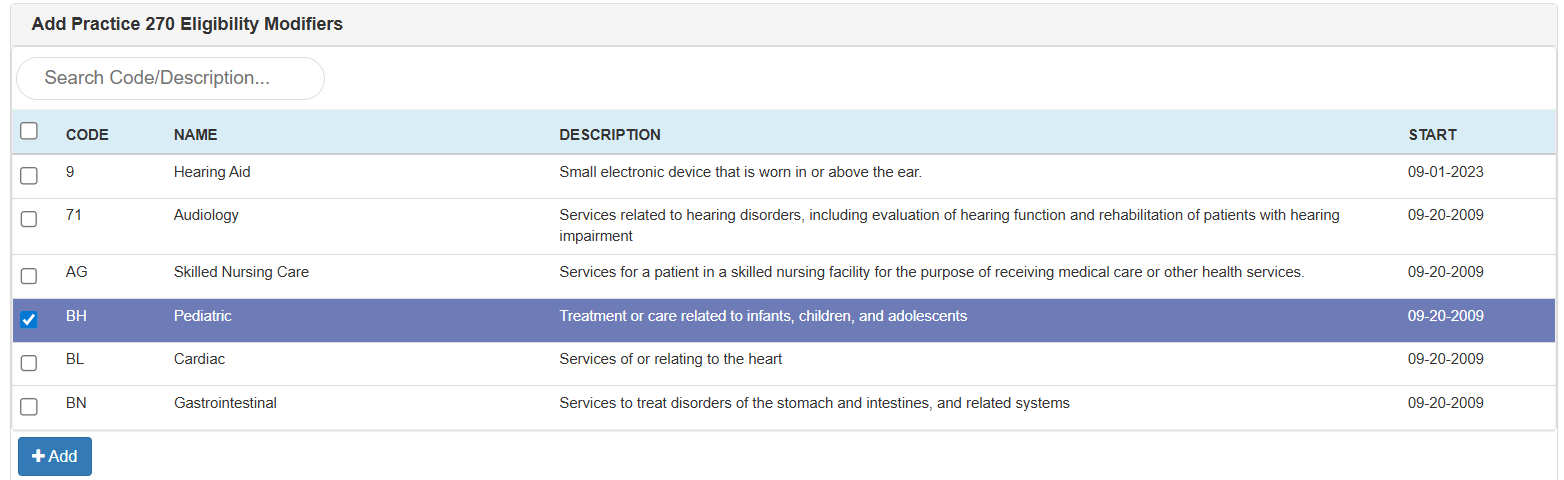
The Eligibility Modifiers setting allows practice administrators to choose which active eligibility benefit categories apply to their practice’s insurance eligibility requests.
By selecting relevant modifiers—such as Mental Health (MH), Audiology (71), or Hearing Aid (F4)—your practice can retrieve more specific and accurate benefit information during eligibility checks.
STEPS
- Log in to your practice account.
- Navigate to Practice Administration → Billing Setup → Practice Revenue Codes.
- Go to the Add Practice 270 Eligibility Modifiers section.

- Select one or more modifiers to enable, then click Add.
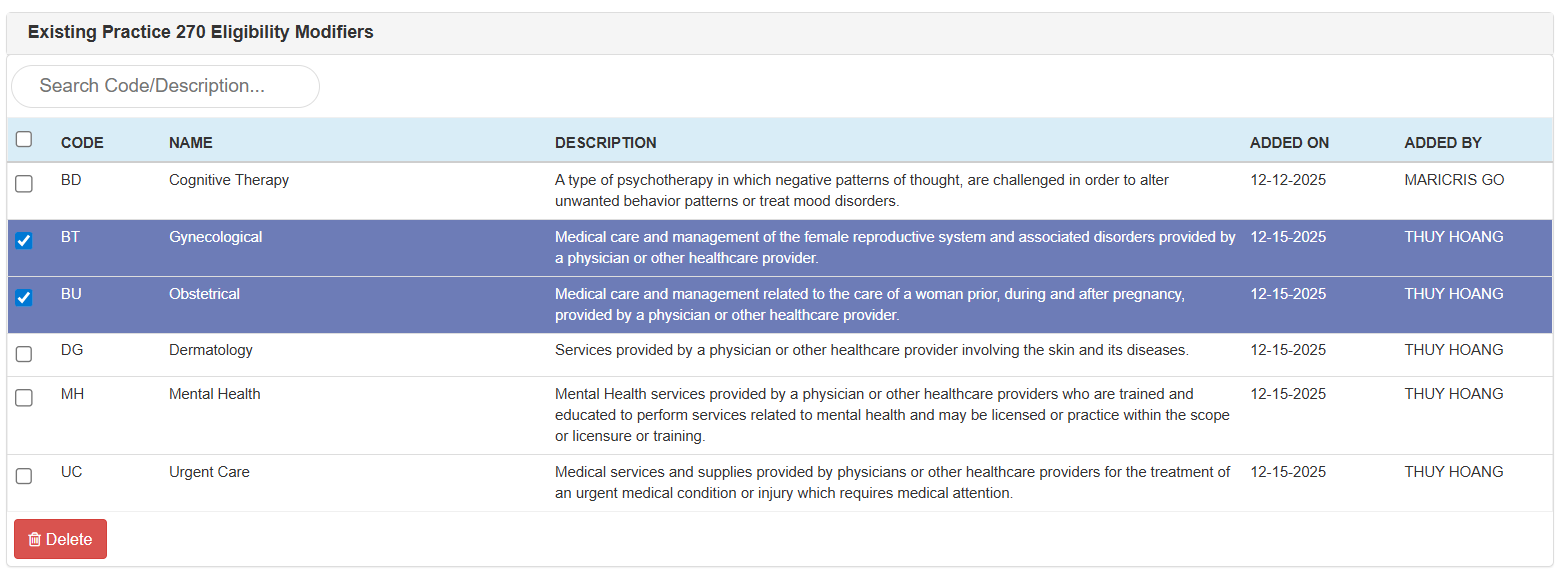
- Selected modifiers will appear in the Existing Practice 270 Eligibility Modifiers list at the bottom of the page.
- To remove a modifier, select it from the list and click Delete.

NOTES
- No changes in the workflow.
- Settings apply at the practice level and can be updated at any time.
When you need to review a patient’s laboratory results, the EHR provides a quick, streamlined way to access and explore everything you need in one place.
Note: At this stage, the View Lab Results (Beta) feature displays only lab results received electronically through the Lab Interface. Support for additional result sources will be added soon.
Step 1. Open the Lab Results Viewer
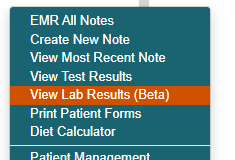
You can access a patient’s Lab Results page through several convenient entry points within the EHR:
- From Today’s Appointment List: Hover over on patient’s name → View Lab Results (Beta)
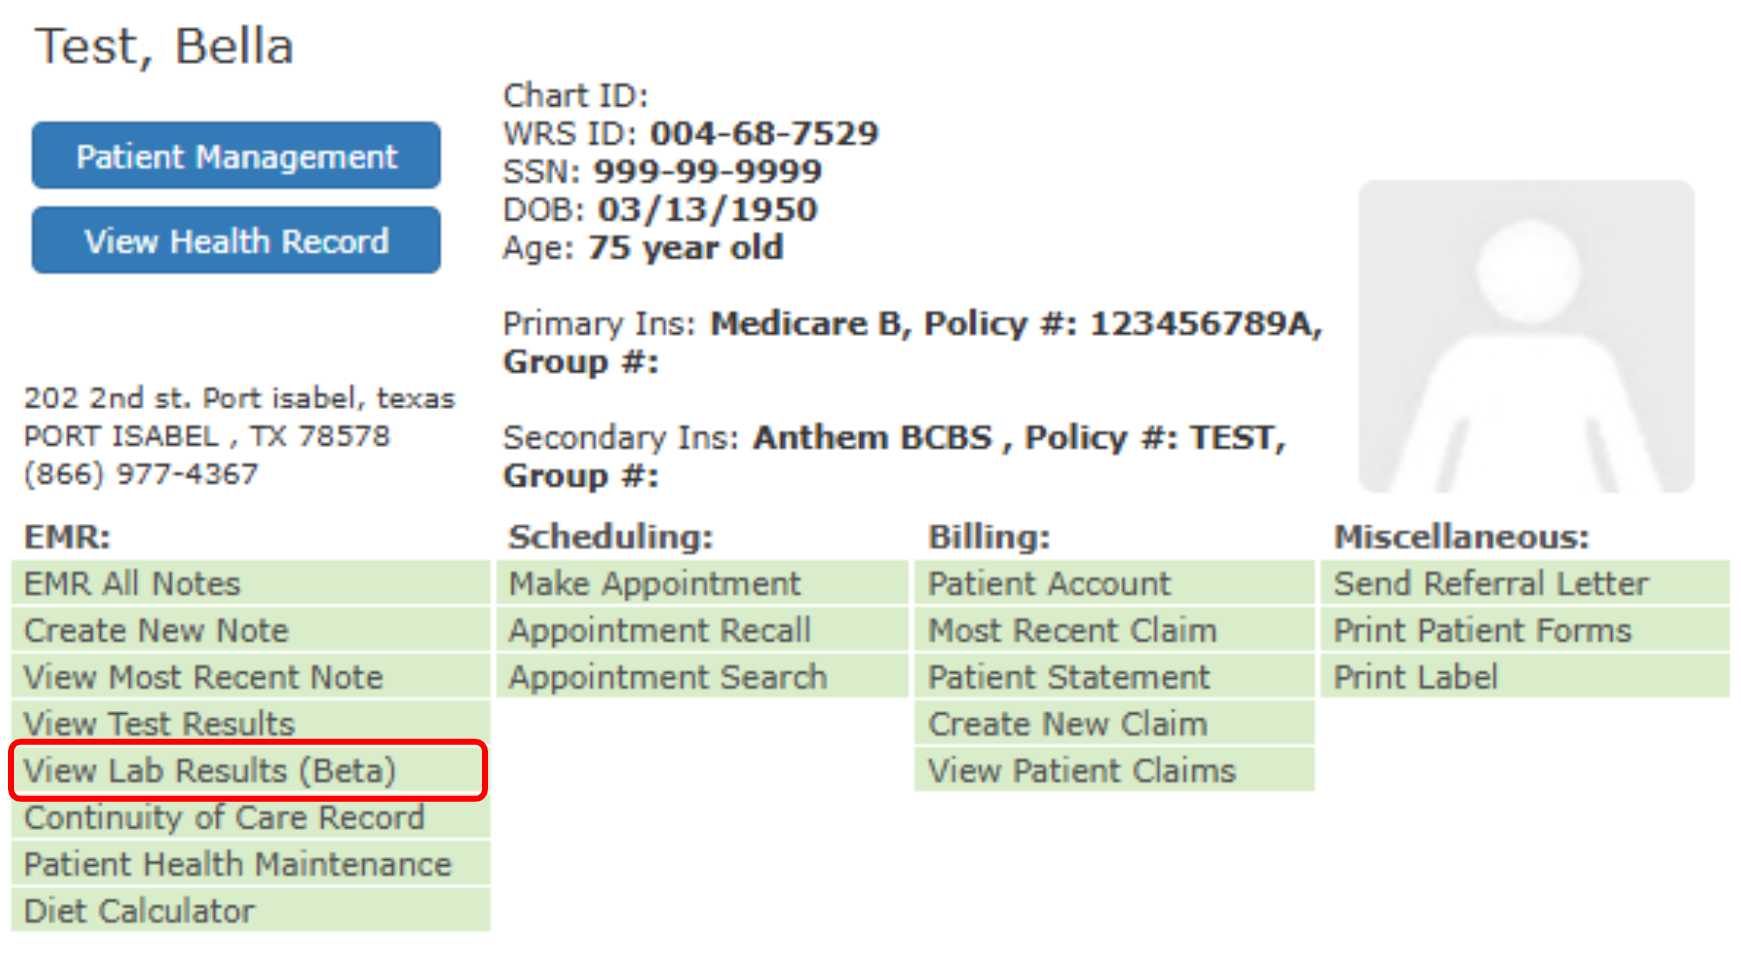
- From Today’s Appointment List, or from Recently viewed patient: Right+click on patient’s name → View Lab Results (Beta)
- Search for a patient: Right+click on patient’s name → View Lab Results (Beta)


Step 2. Access the Lab Results Viewer Main Page
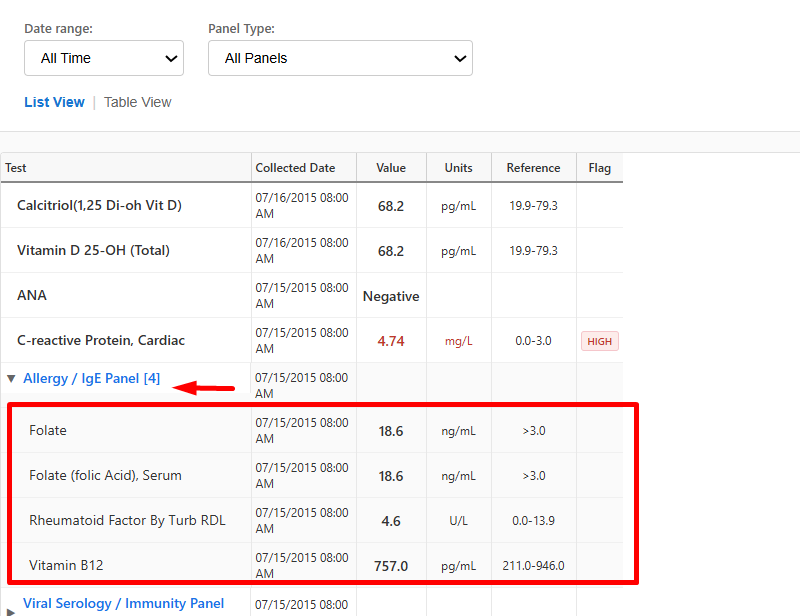
- The page opens in List View by default.

- In this view, tests are displayed by order date, which makes it easy to review what was performed during a specific visit or on a specific date.
- Each panel is clickable and expands to show the tests under it, giving you a clear chronological view of results over time.
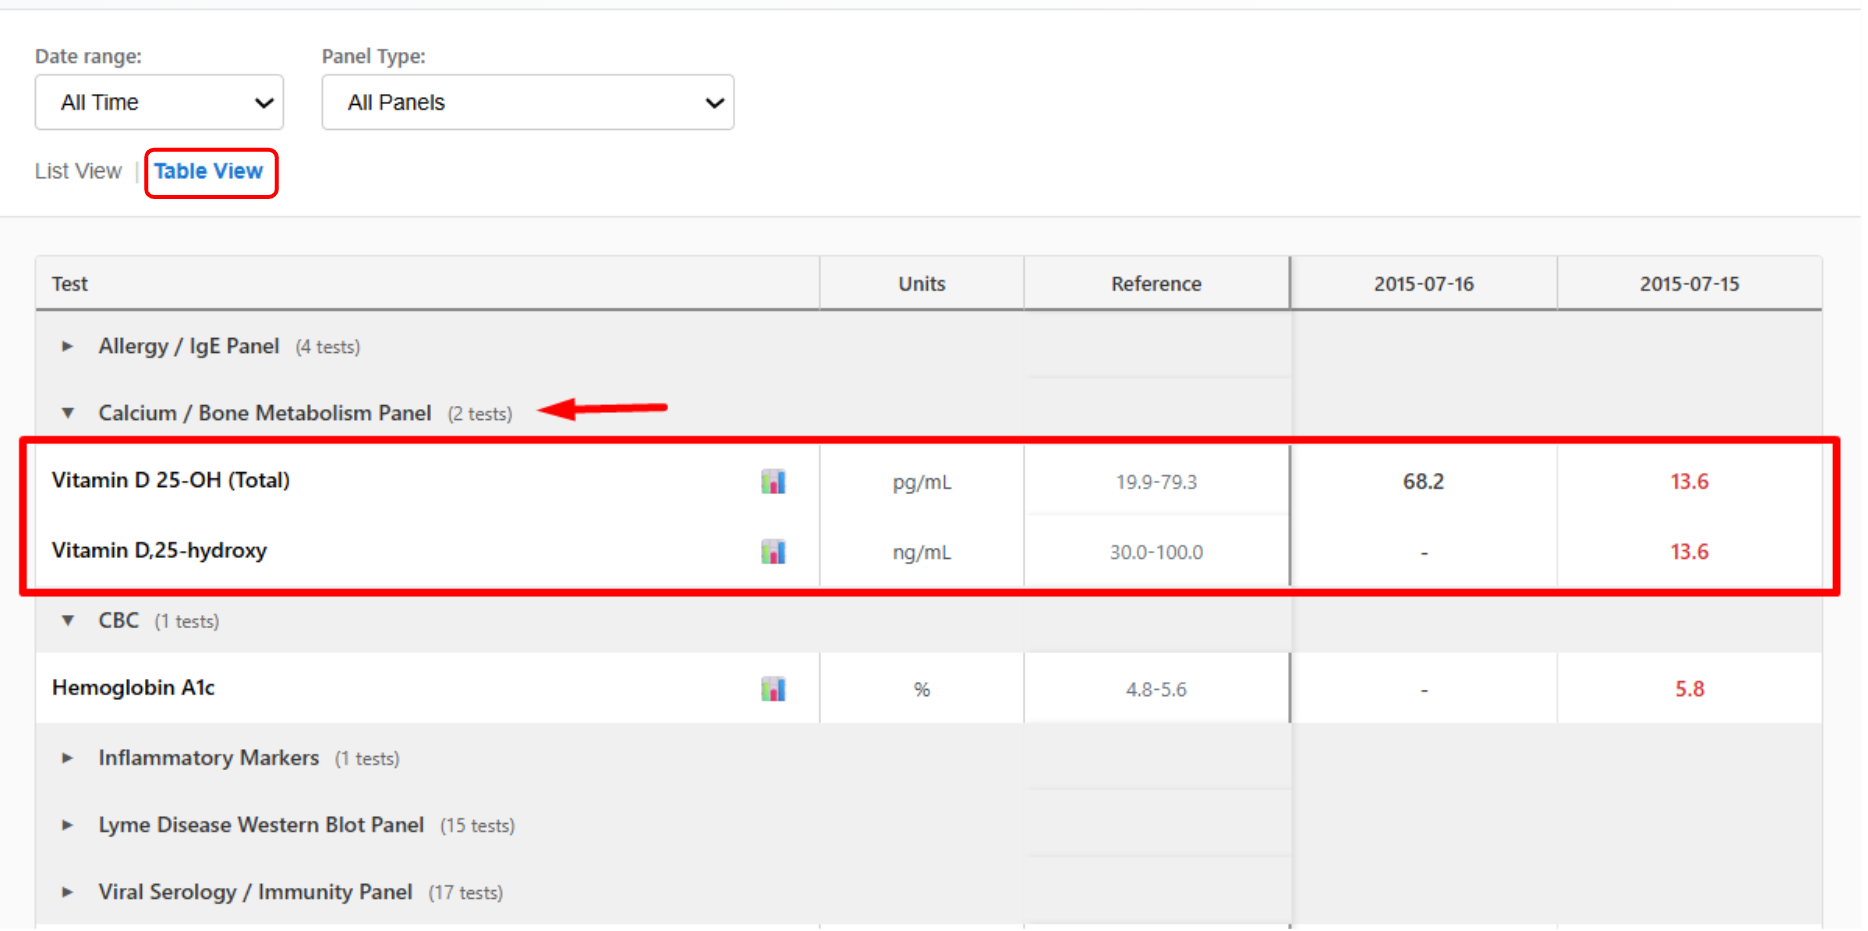
Step 3. Switch Views if You Prefer a Different Layout
- If you prefer to review results alphabetically by panel, you can switch to Table View using the toggle at the top.
- Table View groups tests by panel name, making it easier to quickly find a specific test or panel regardless of when it was performed.
Step 4. Narrow the Results Using Filters
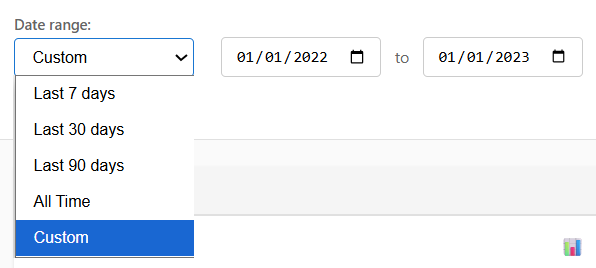
Use the Date Filter
- If you’re looking for results within a certain timeframe — for example, the past week or month — open the Date Filter and pick a preset range or choose a custom date span.
- The list will update right away.

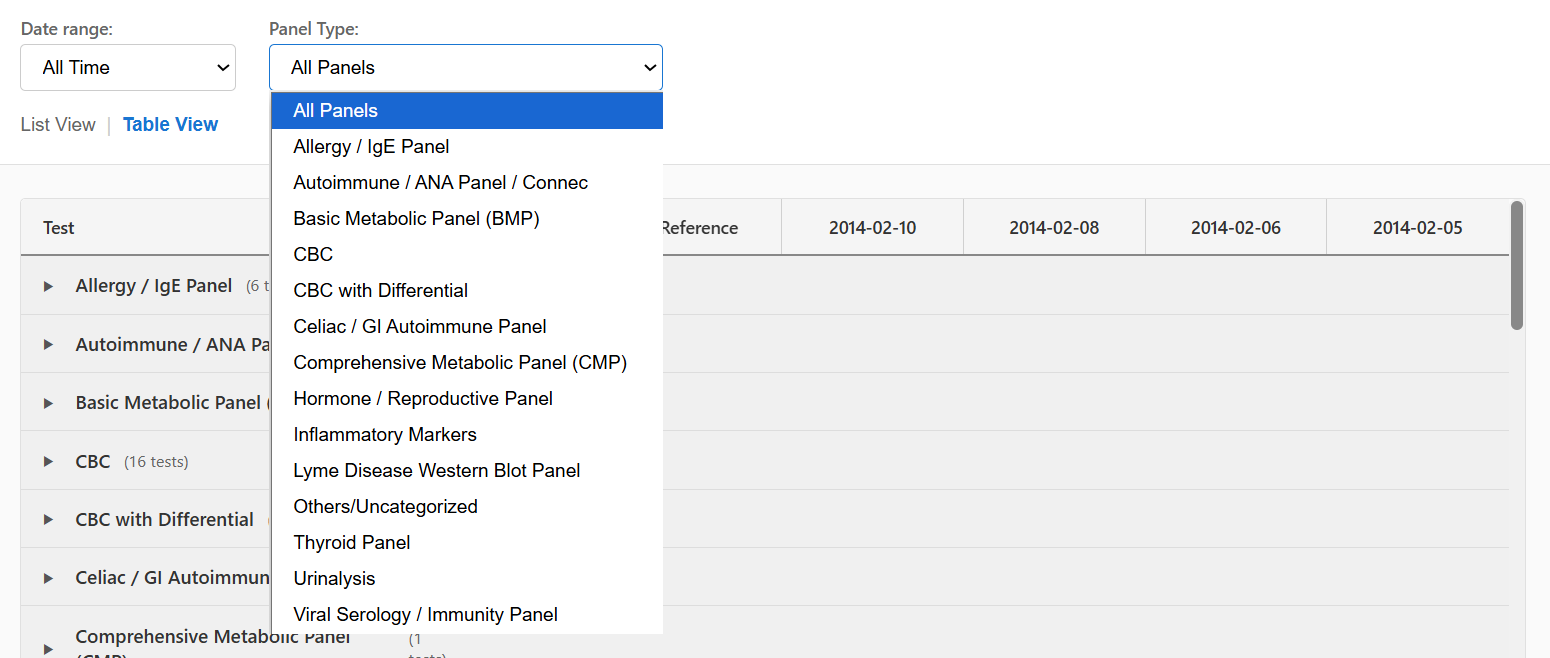
Use the Panel Filter
- If you want to focus on a particular group of tests ( i.e. CBC with Differential ), open the Panel Filter and select the panel you want.
- Only the tests from that panel will appear. You can even combine both date and panel filters for a more focused review.

Step 5. View Trends using Graph
- If you need to see how a specific test has changed over time, click the –
 Graph Icon next to the test.
 - A chart will appear showing the results across different dates.
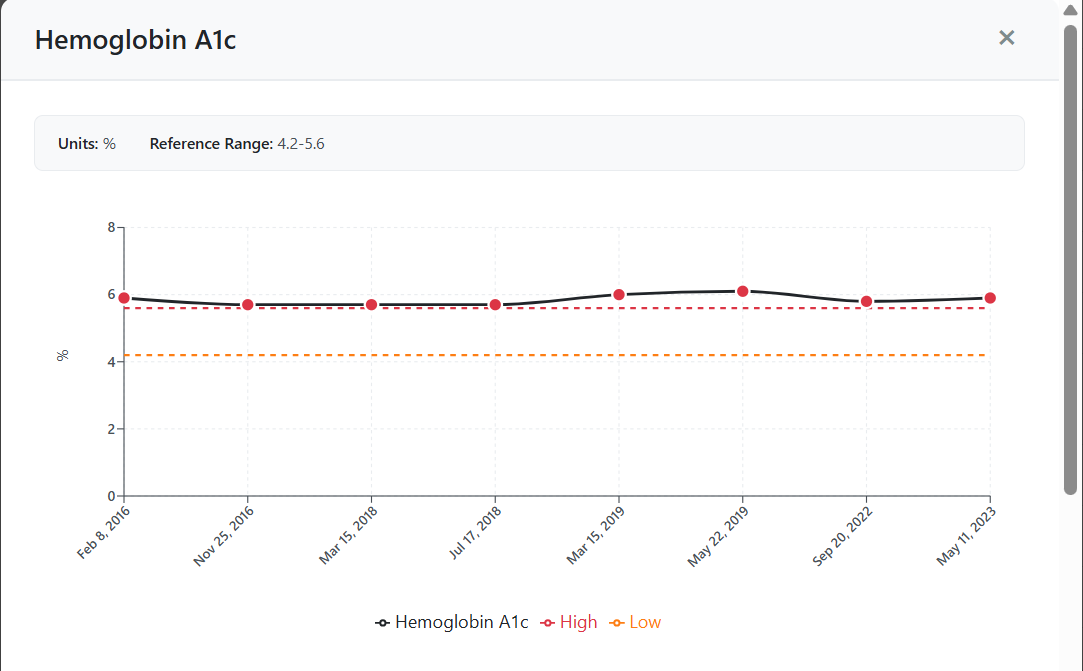
- Hover over any point to see the exact value and date.
- Normal and abnormal results are highlighted with different colors.
- You can move across the graph, with either vertical or horizontal scroll to view longer timelines.
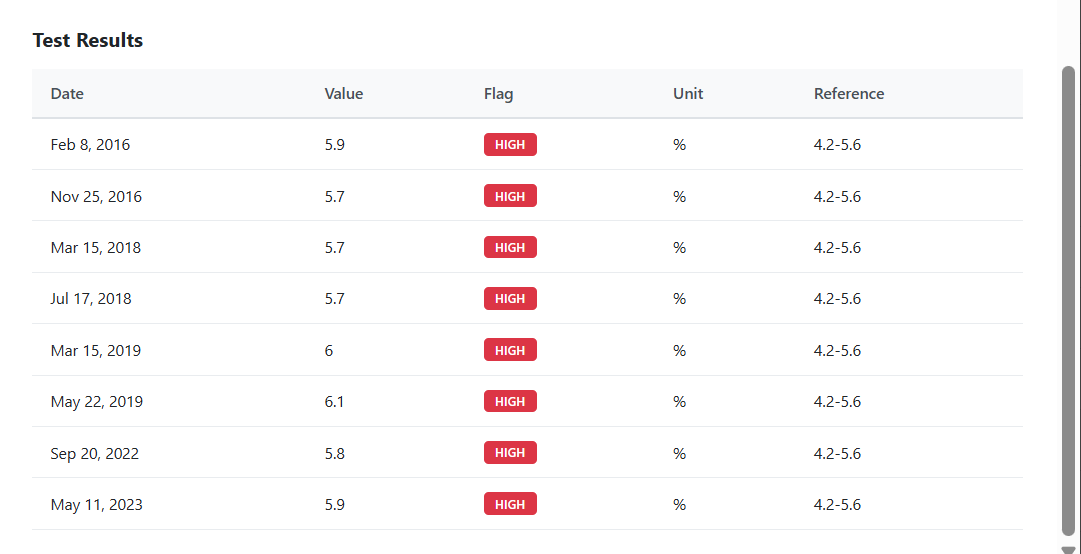
- A table below the graph also lists the same values organized by dates for quick reference.


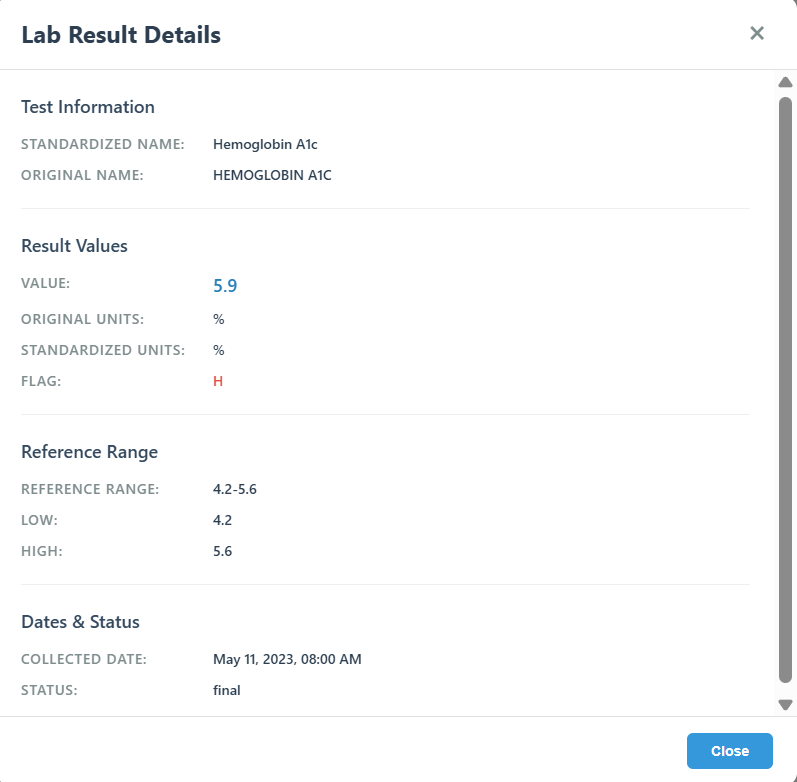
Step 6. View Full Result Details
- Whenever you need more detail about a specific test, just click the row or the test name.
- A pop-up window will appear showing details about that test, including units, reference ranges, and the exact date it was recorded.

You’re Done!
This step-by-step process helps you quickly locate lab results, filter what you need, and interpret values visually or numerically — all within a single streamlined viewer.
]]> /user-guides/mobilemd/install-mobilemd-app/ Fri, 07 Nov 2025 15:33:52 +0000 /?post_type=userguides&p=11048 Getting Started with WRSHealth MobileMDMobileMD is a mobile extension of the WRSHealth EHR designed to give providers secure, on-the-go access to essential clinical tools. It enables physicians and care teams to capture information, review records, and manage documentation conveniently from their mobile device—without interrupting workflow.
For IOS Device
1. Open the App Store. 
2. Search “WRS MobileMD”.
3. On the results list, look for the app published by WRSHealth.
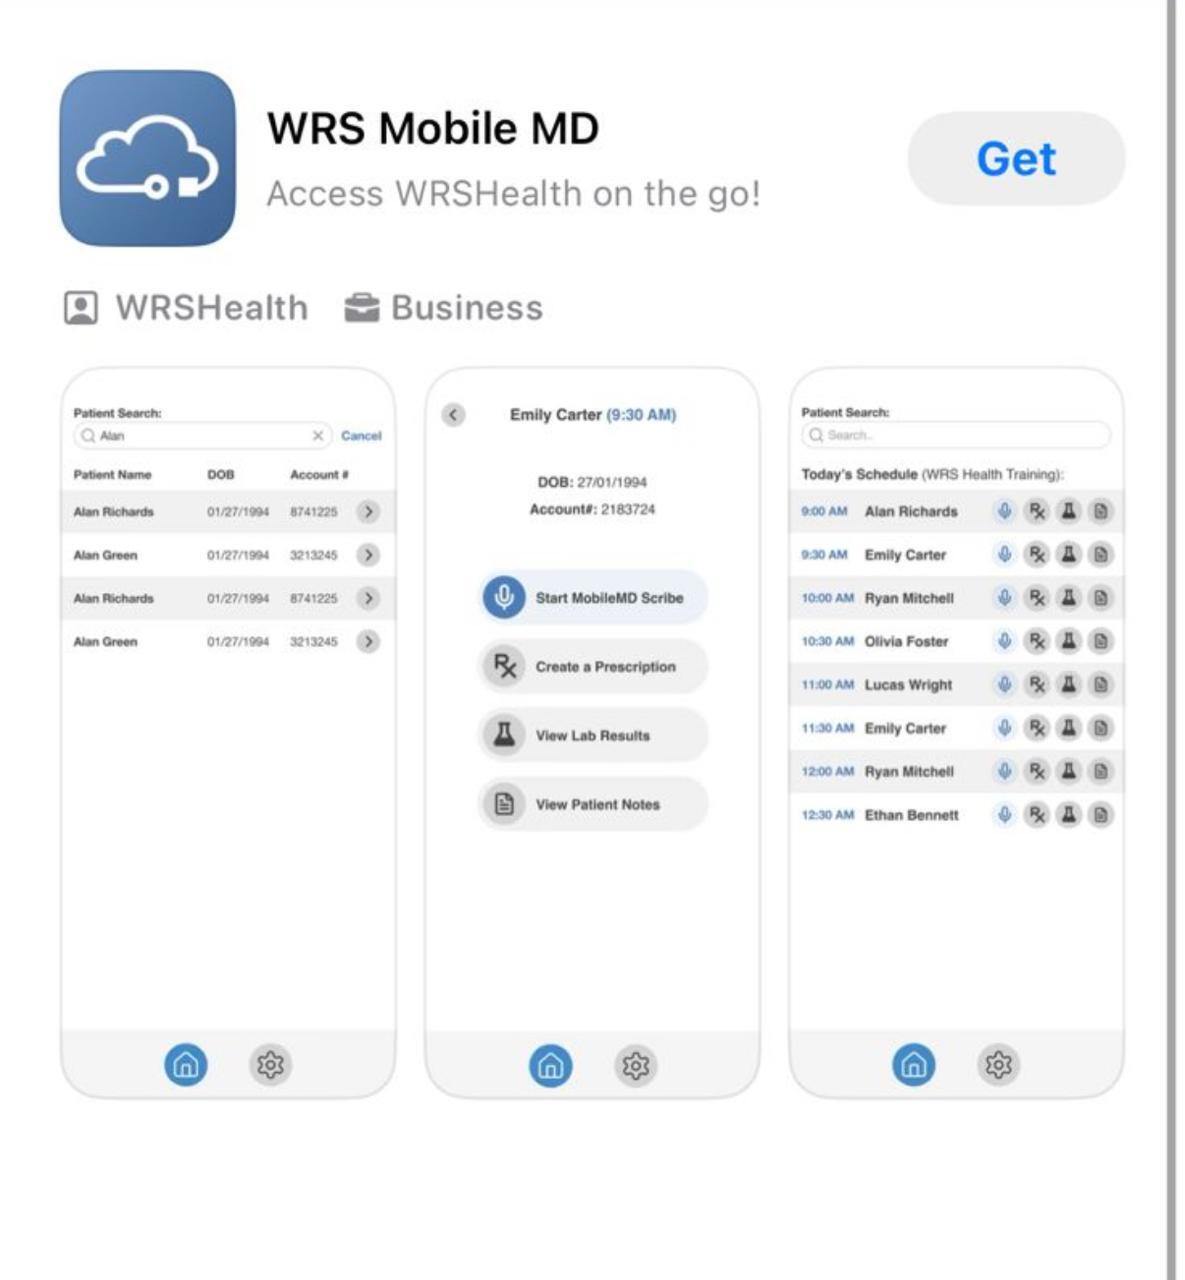
4. Tap Get to proceed.
5. Authenticate the download
- Confirm with Face ID, Touch ID, or your Apple ID password when prompted.
6. Wait for Installation, once complete, the button will change to Open.
7. Tap Open to launch or, return to your home screen or app drawer to find and open it later.
8. Log In
- Enter your WRS credentials (username and password).
- Complete authentication via OTP (One-Time Password) sent to your registered email or phone.
For Android Device
1. Open the Google Play Store. 
2. Search “WRS MobileMD”.
3. On the results list, look for the app published by Waiting Room Solutions, LLLP.
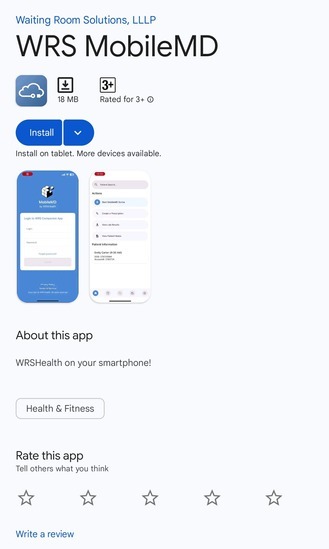
4. Tap Install to proceed.
5. Wait for Installation, once complete, the button will change to Open.
7. Tap Open to launch Or, return to your home screen or app drawer to find and open it later.
8. Log In
- Enter your WRS credentials (username and password).
- Complete authentication via OTP (One-Time Password) sent to your registered email or phone.
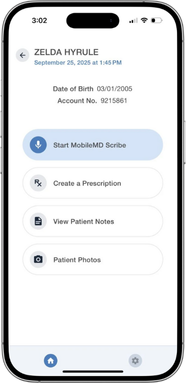
Securely capture patient photos within the workflow. Photos are stored directly in the patient’s chart as part of their medical record—supporting identification, documentation, and continuity of care.
STEPS
Open a patient profile by tapping their name in the Today’s Appointments list or by using the Search function.

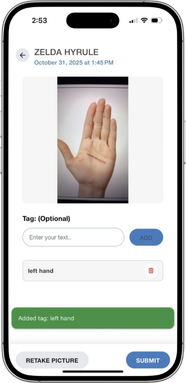
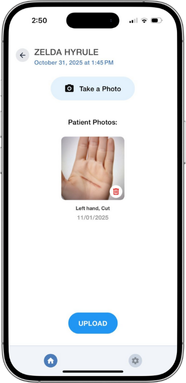

- Upload up to 8 photos per patient encounter.
- Photos are saved directly to the patient’s record in EMR Notes.
Accessing Patient Photos in EHR
The Patient Photos feature in MobileMD allows providers to capture, tag, and upload patient images directly into the EMR.
- Log in to the EHR.
- Go to Today’s Appointment List → right-click the patient’s name → EMR All Notes.
- Open the Documents section → Mobile MD to view photos for the encounter.
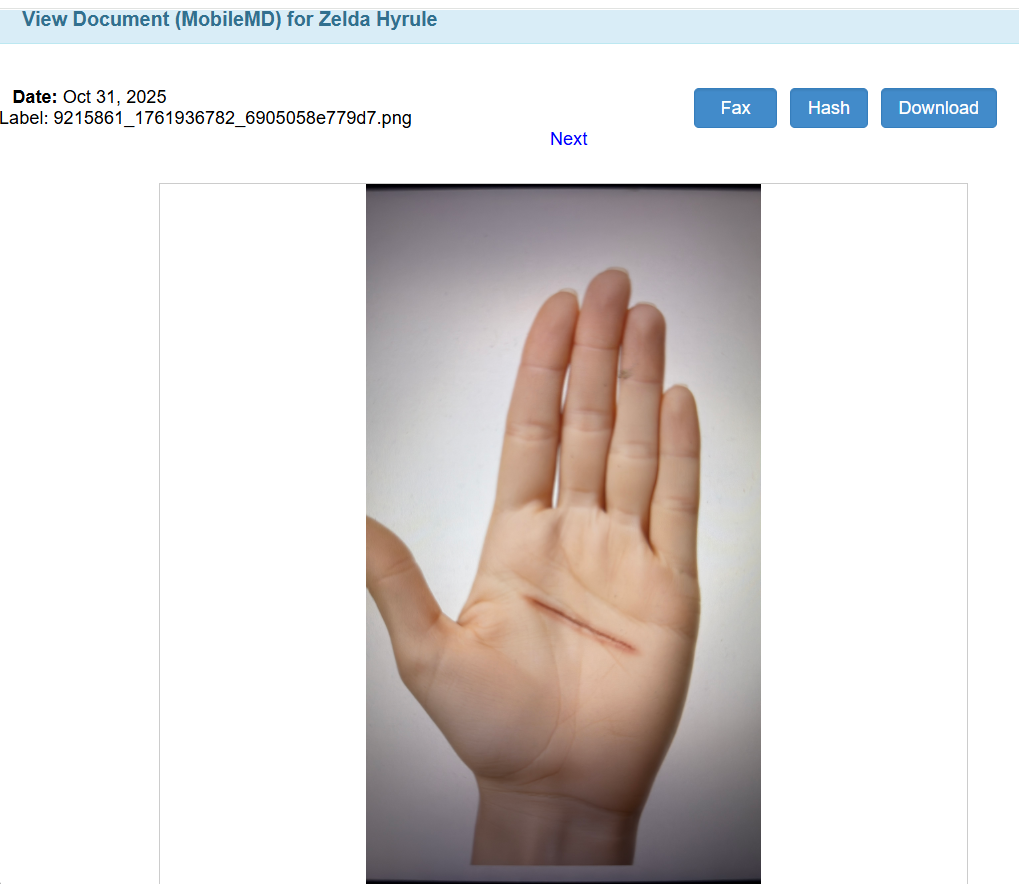
- Click the filename to view the photo.
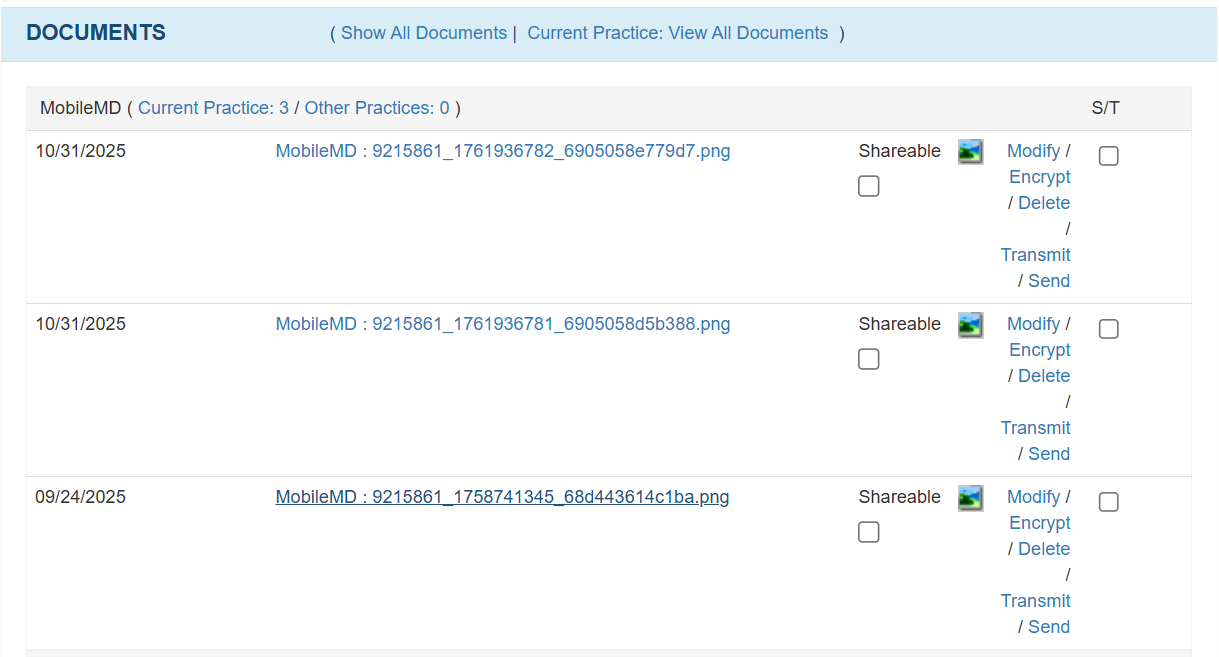
- View photo details or download.
For a downloadable PDF version of this guide, click here.
]]> /user-guides/billing/payments-in-the-check-in-module/ Thu, 06 Nov 2025 13:09:03 +0000 /?post_type=userguides&p=11028 Payments in the Check-In ModuleWhen Stripe Payments is enabled for your practice, the Check-In process includes a secure option to review outstanding balances and make co-payments using your credit or debit card. Follow the steps below to complete your check-in and payment quickly and safely.
STEPS
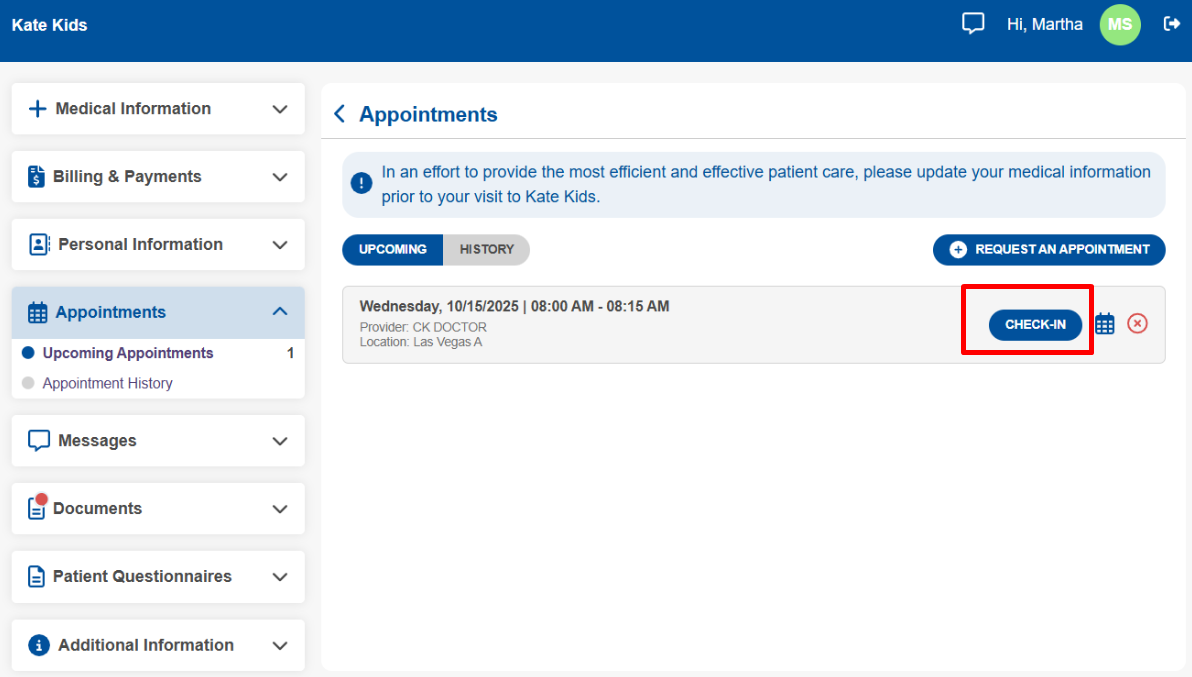
1. Start the Check-In
- On the day of your visit, the Check In button appears next to your appointment in the patient portal. Click it to begin the check-in process.
2. Complete Required Forms
- Follow the guided steps to review and update your Patient Profile, Pharmacy, Provider Information, and complete the Patient Intake Questionnaire.
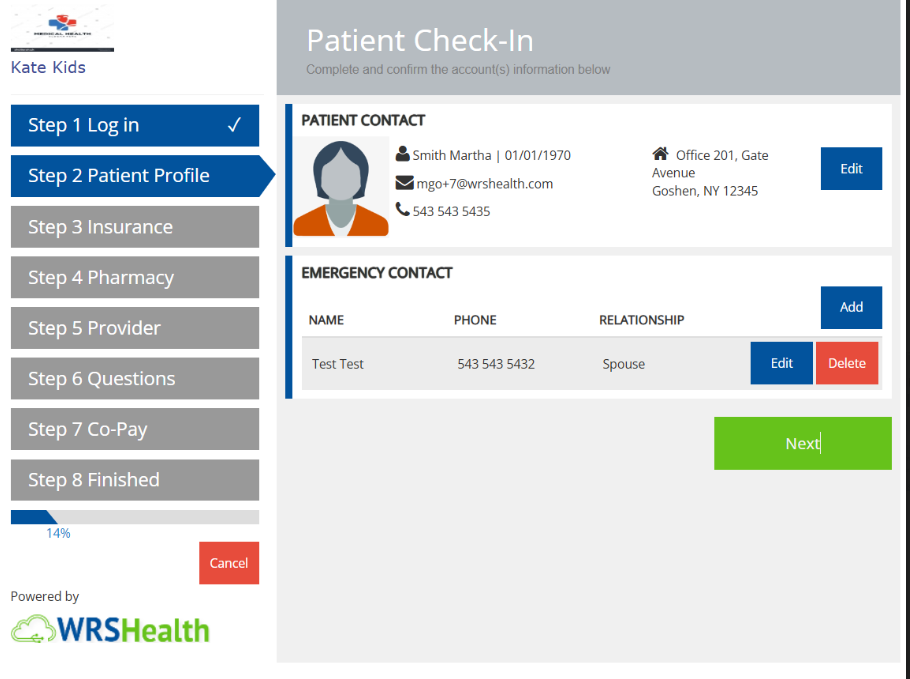
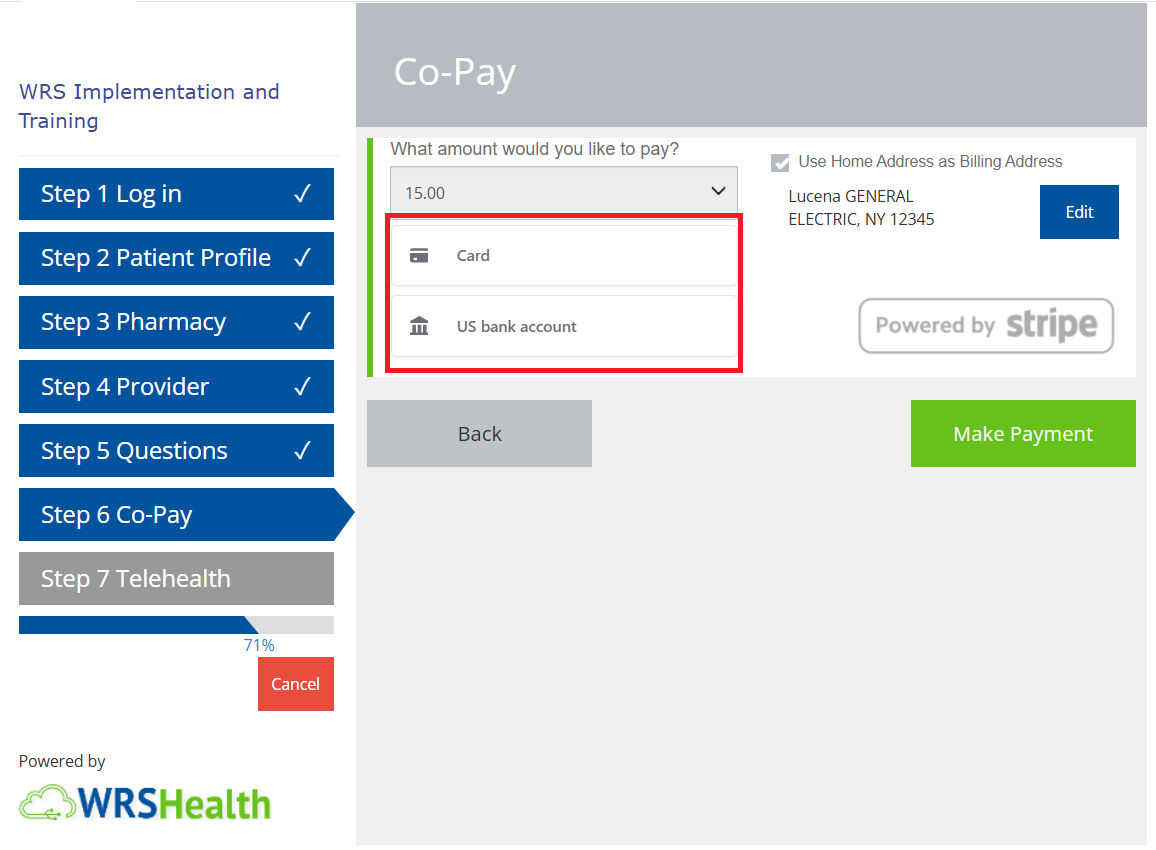
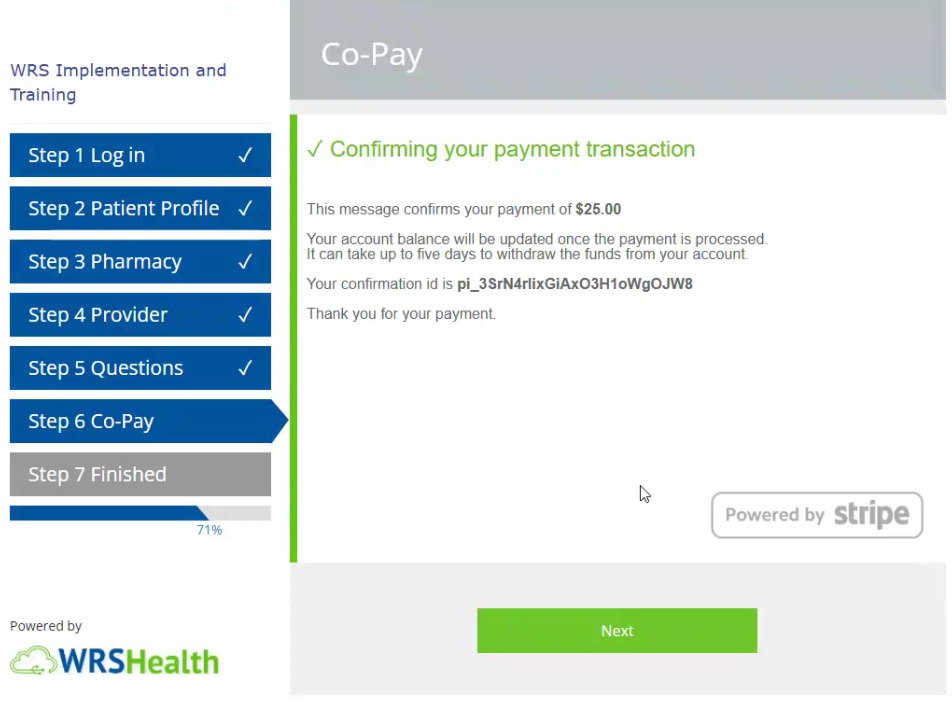
3. Proceed to Co-Pay/Payments
- Review your outstanding charges and enter the amount you wish to pay.
- Under Payment Method, select one of the available options:
- Credit Card
- ACH Bank Transfer
- Google Pay or Apple Pay
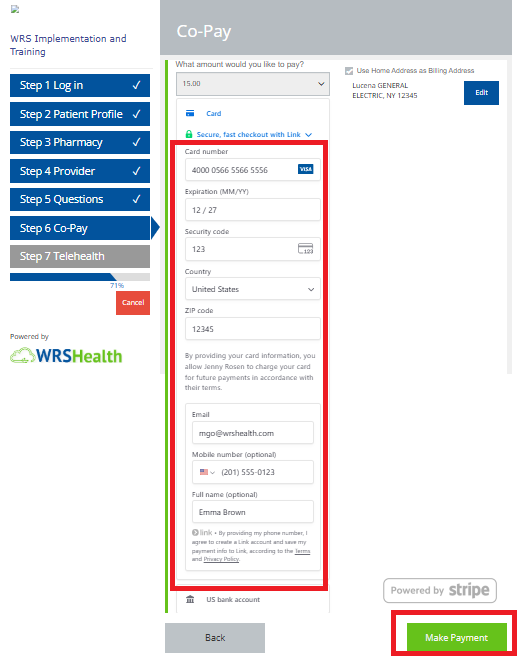
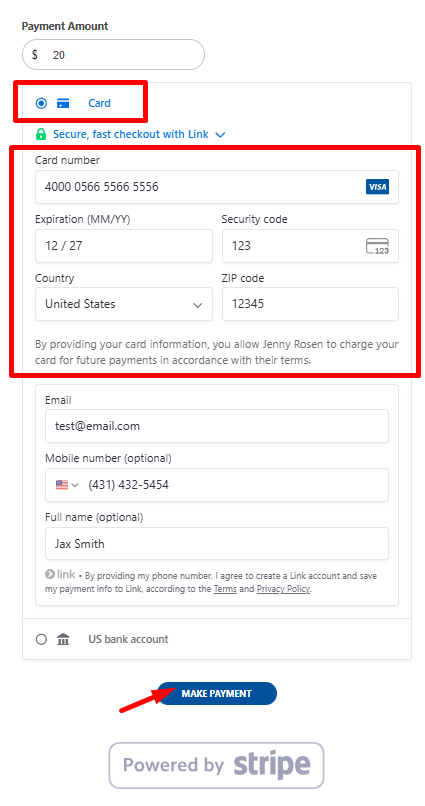
Paying with a Credit Card
- Choose one of the following:
- Saved Credit Card – Use a previously saved card for quick payment.
- New Credit Card – Enter your card details exactly as they appear on the card.

- For New Credit Card, enter your card account details.

➜
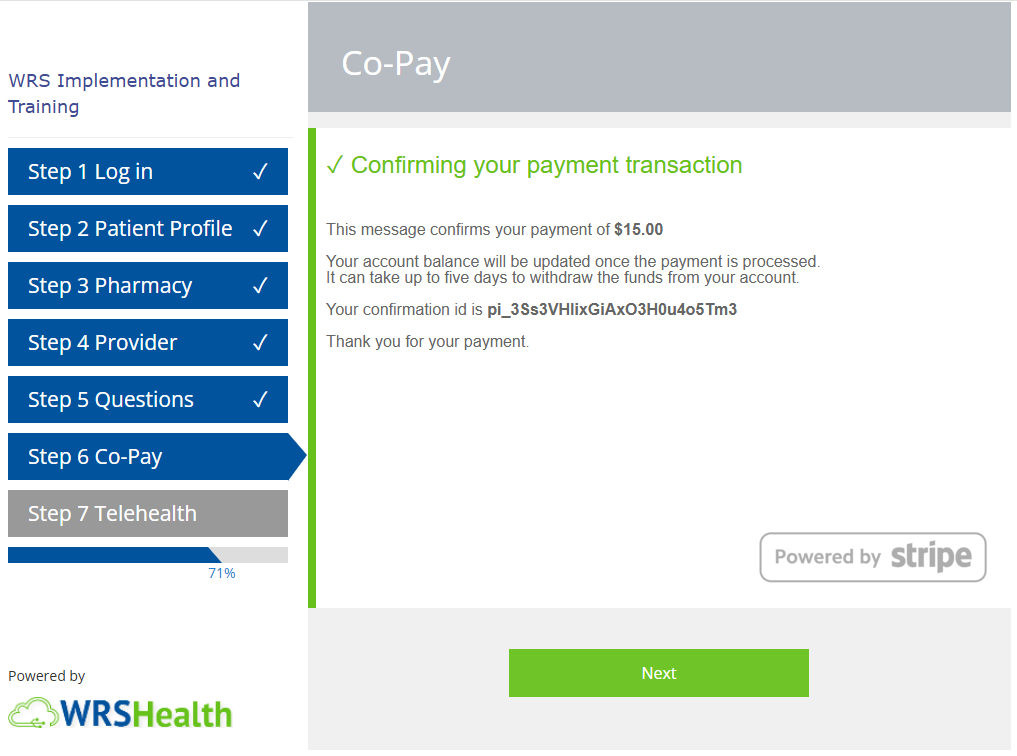
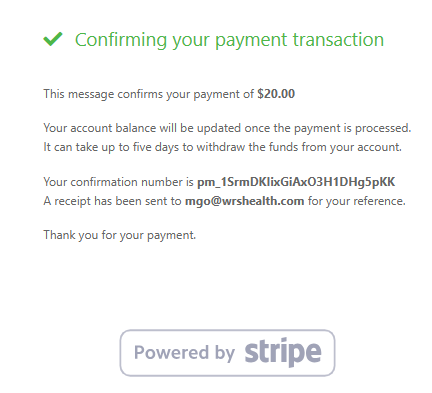
- Click Make Payment to complete transaction.
- You will see an on-screen confirmation and receive an email receipt once the payment is processed.
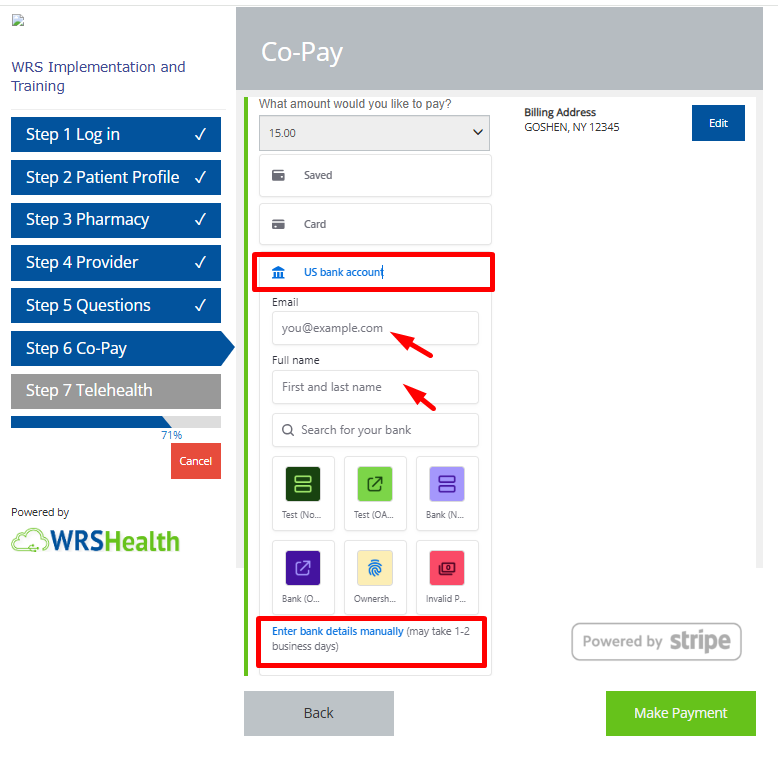
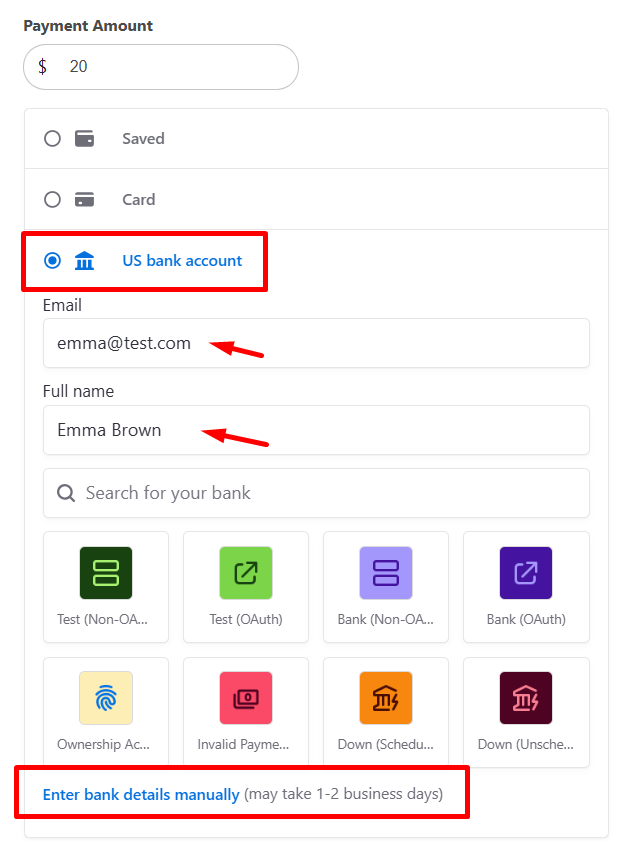
Paying with ACH (Bank Transfer)
ACH payments allow you to pay directly from your bank account.
- Select ACH (Bank Transfer) as the payment method.
- Enter your email address and full name.
- Search for and select your bank or Enter Bank Details Manually at the bottom of the page.

➜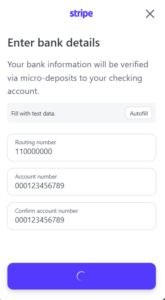
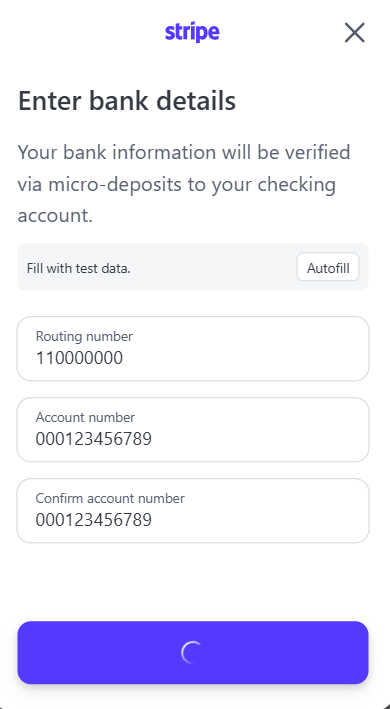
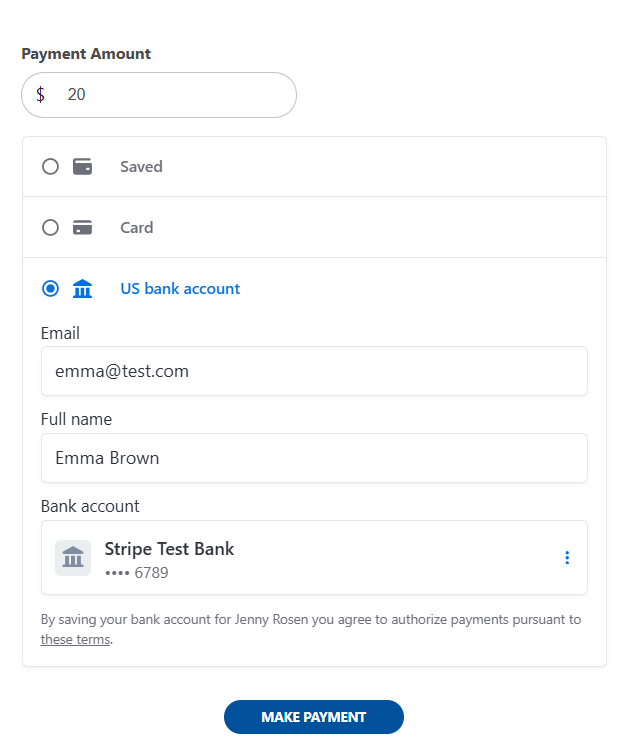
- Enter the required bank details:
- Routing Number
- Account Number
- Confirm your account and Submit.
- Click Make Payment to submit your request.
- You will see an on-screen confirmation and receive an email receipt once the payment is processed.
Notes
- ACH processing time: Payments may take 1–3 business days to complete.
- Pending status: Your payment may appear as Pending until processing is finalized.
- Email confirmation: You will receive an email once your payment has been successfully submitted.
Paying with Google Pay
Google Pay enables quick payments using your saved Google payment methods.
- Select Google Pay as the payment method.
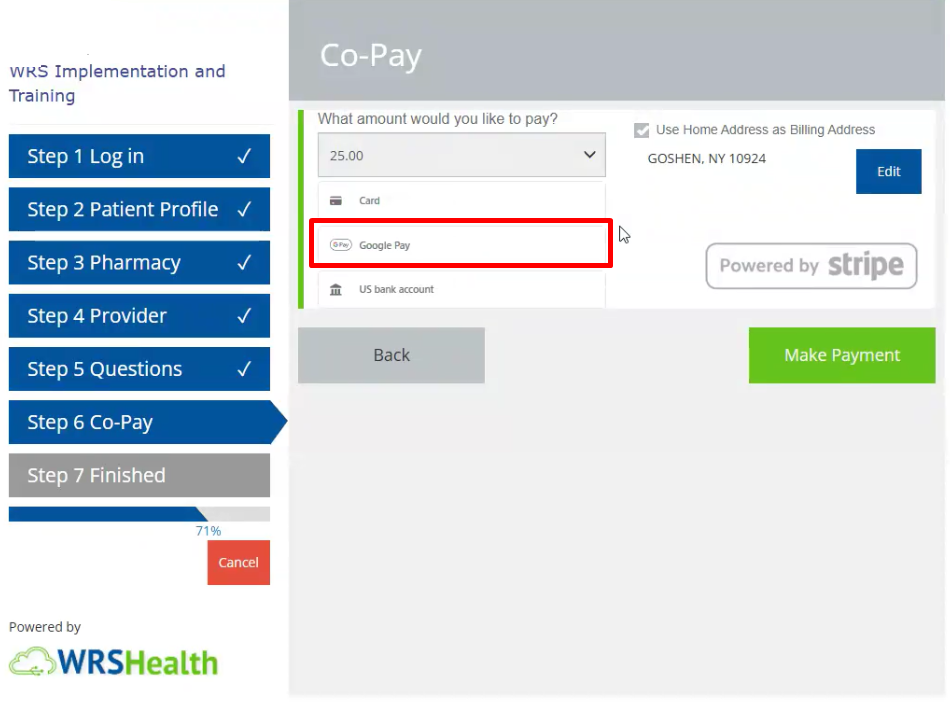
- Choose a saved card or payment option from your Google Pay wallet.
- Review and click Pay Now complete transaction.
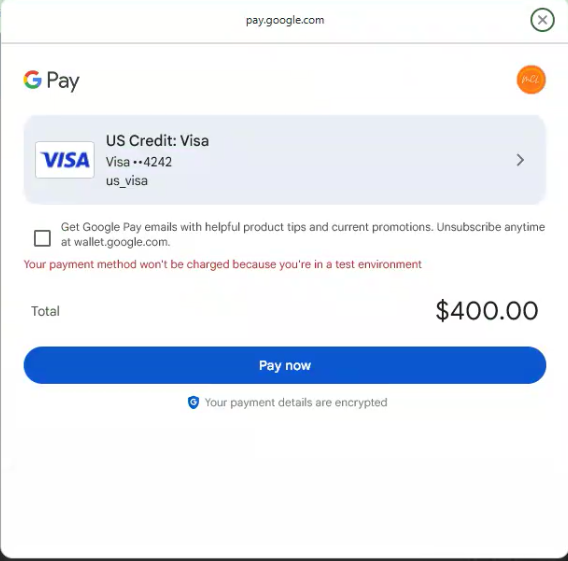
➜
- After completion:
- A confirmation message will appear on screen.
- An email receipt will be sent to your registered email address.


Notes
-
- Apple Pay & Google Pay: Both follow a similar checkout process and are displayed automatically on supported devices and browsers.
4. Proceed to your Telehealth Visit.
Once check-in is complete, you can proceed to your Telehealth visit at the scheduled time.
]]> /user-guides/billing/billing-and-payments-in-patient-portal/ Thu, 06 Nov 2025 13:08:52 +0000 /?post_type=userguides&p=11024 Billing and Payments in the Patient PortalPatients can conveniently view and pay their medical bills online through the Patient Portal. The Billing & Payments section allows you to review current statements and make secure online payments using multiple payment methods, including Credit Card, ACH (Bank Transfer), Apple Pay, and Google Pay.
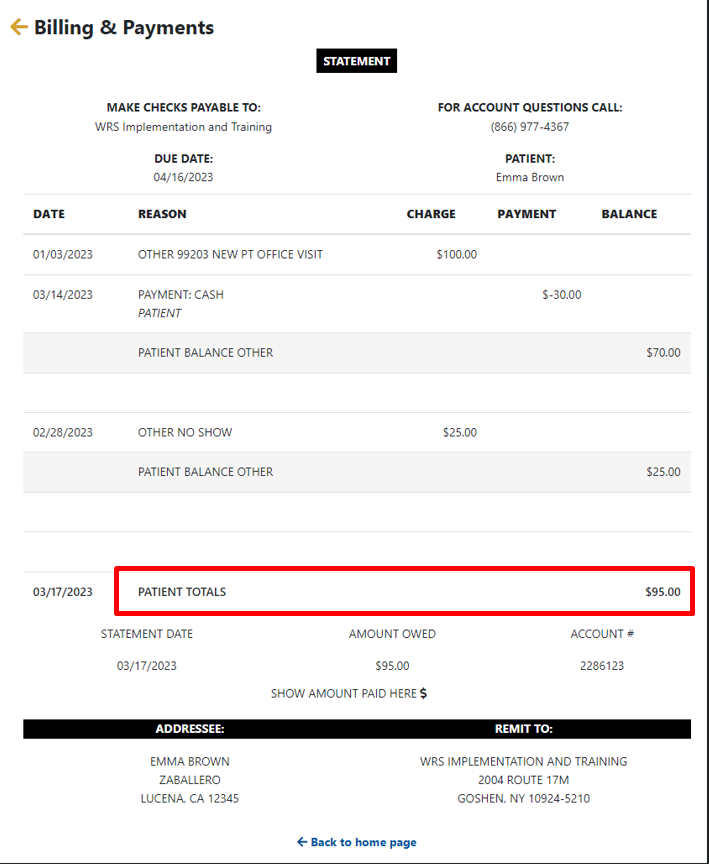
Viewing Your Current Statements
Your current statement shows the amount due as of today, including any outstanding balances from previous visits.
To view your statement, go to Billing & Payments → View Current Statement.
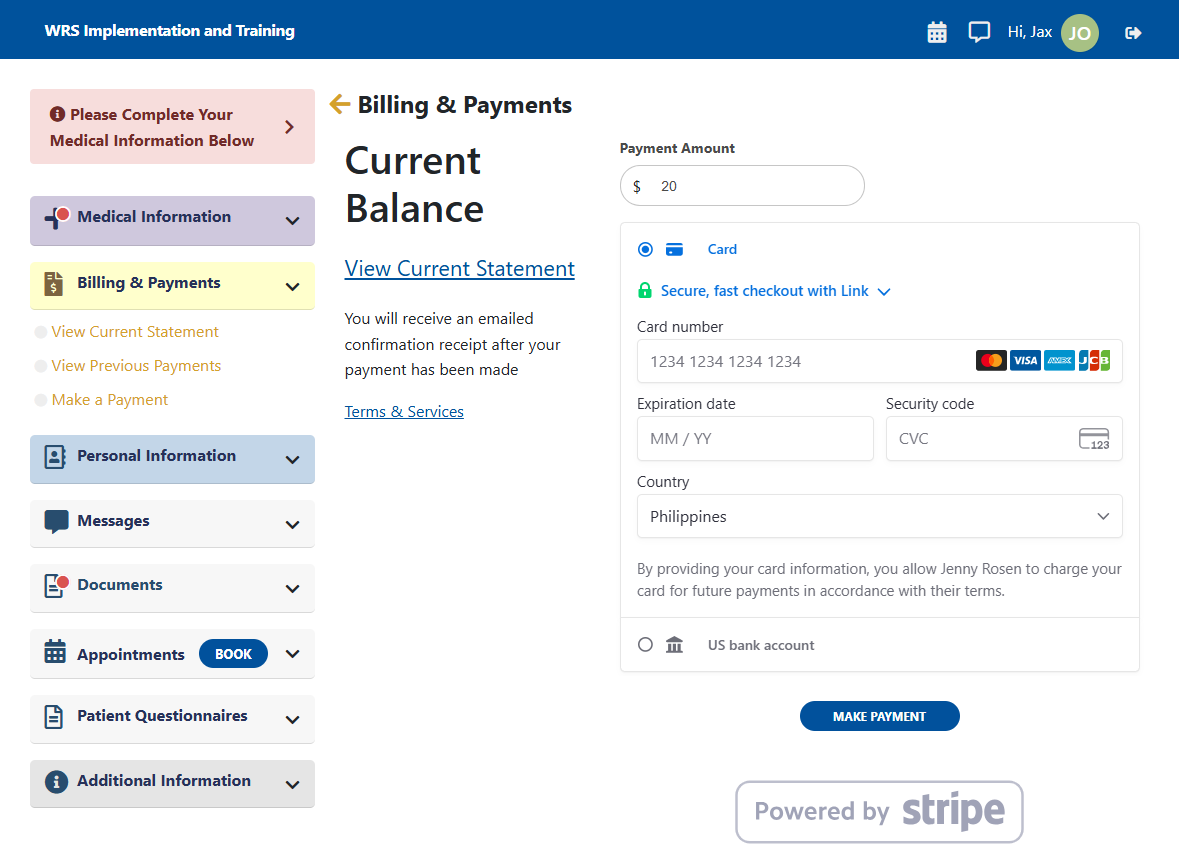
Making an Online Payment
- Navigate to Billing & Payments → Make a Payment.
- The amount displayed reflects your current balance. To make a partial payment, enter the amount you wish to pay.
- Under Payment Method, select one of the available options:
- Credit Card
- ACH Bank Transfer
- Google Pay
- Apple Pay
Paying with a Credit Card
- Choose one of the following:
- Saved Credit Card – Use a previously saved card for quick payment.
- New Credit Card – Enter your card details exactly as they appear on the card.
- For New Credit Card, enter your card account details.
 ➜
➜
- Click Make Payment to complete transaction.
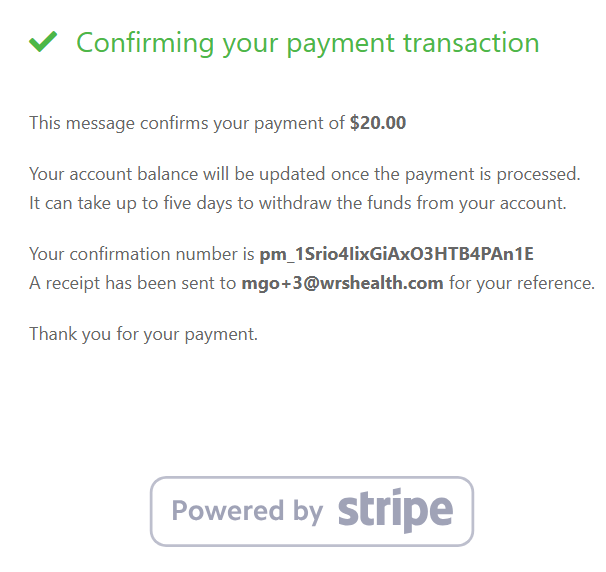
- You will see an on-screen confirmation and receive an email receipt once the payment is processed.


Paying with ACH (Bank Transfer)
ACH payments allow you to pay directly from your bank account.
- Select ACH (Bank Transfer) as the payment method.
- Enter your email address and full name.
- Search for and select your bank or Enter Bank Details Manually at the bottom of the page.
➜ - Enter the required bank details:
- Routing Number
- Account Number
- Confirm your account and submit.
- Review the payment amount.
- Click Make Payment to submit your request.

Notes
- ACH processing time: Payments may take 1–3 business days to complete.
- Pending status: Your payment may appear as Pending until processing is finalized.
- Email confirmation: You will receive an email once your payment has been successfully submitted.
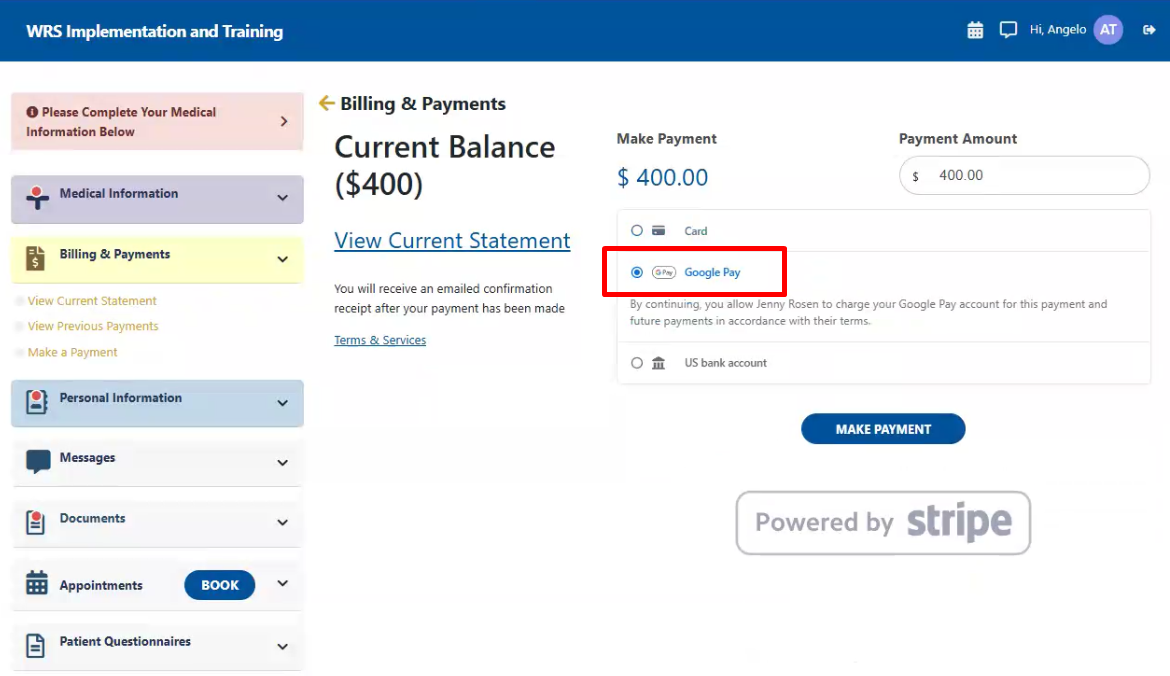
Paying with Google Pay
Google Pay enables quick payments using your saved Google payment methods.
- Select Google Pay as the payment method.

- Choose a saved card or payment option from your Google Pay wallet.
- Review and click Pay Now complete transaction.
➜
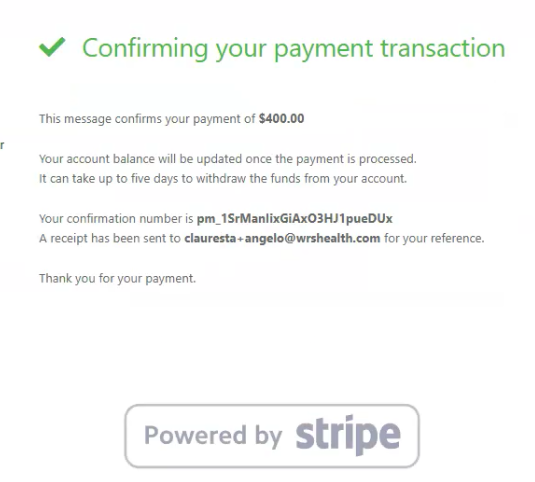
- After completion:
- A confirmation message will appear on screen.
- An email receipt will be sent to your registered email address.
Notes
-
- Apple Pay & Google Pay: Both follow a similar checkout process and are displayed automatically on supported devices and browsers.