
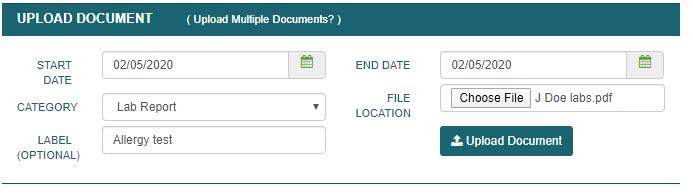
UPLOAD DOCUMENT
GO TO
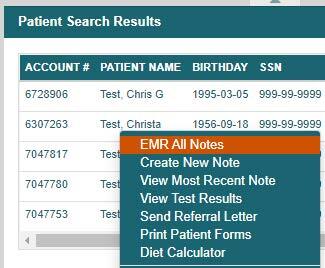
Desired patient name → Right click drop-down or hover box → EMR All Notes → Scroll to ‘Upload Document’ section
STEPS
- Select ‘Choose File’ from the ‘File Location’ field
- Search for and select file saved to computer
- Select ‘Open’. You will now see the file name under ‘File Location’
- Select the category you’d like the file to appear under in ‘Documents’
- Add a custom label, if desired
- Select ‘Upload Document’
- Select the file name to view PDF record in patient’s chart (NOTE that if the document is not a PDF it will download to your computer)
Note: You may only upload one document at a time

NOTES
- If a document is accidentally uploaded to the wrong category, or you wish to add a label after upload, select the “modify” option to the right of the document title to make such edits. Only staff with system permissions will be able to modify or delete.
- When documents are scanned into the computer, be sure they are in a folder that is easy to find (such as Documents) and are distinctly labeled (ie- “J Doe labs”). If the scanned document automatically uploads to a hard-to-find default folder, move the document into the desired folder after scanning.