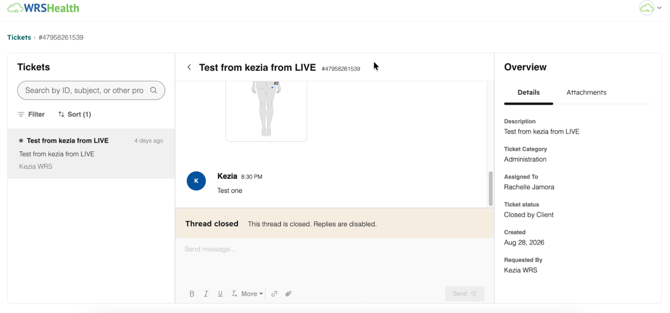
From the EHR, go to Support and select Support Request.
Setup Requirements
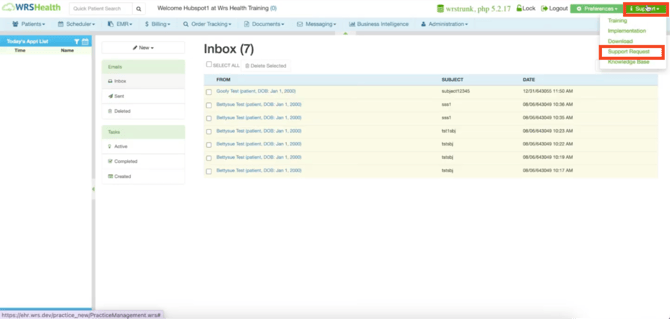
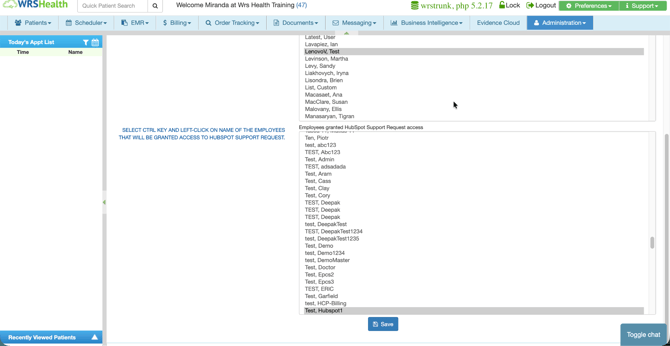
The EHR support ticketing system is accessible to all users who have access to the support functionality. If you have administrative access to the Support Settings of your EHR, you can grant support request access to applicable users.
How to Grant Support Request Access
Practice administrators can grant support access to the applicable users through the Support Settings in the EHR. To do this, follow these steps:
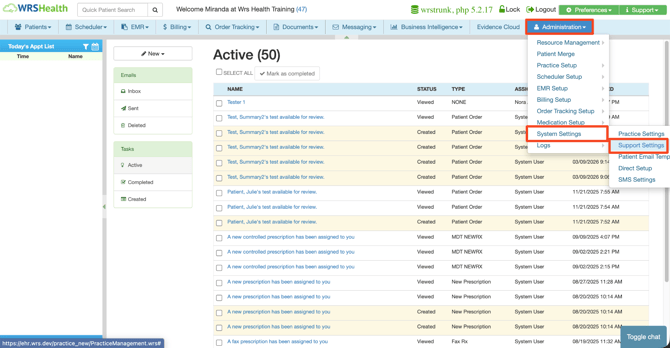
- Log in to the EHR and click Administration.
- From the drop-down menu, click System Settings, and then select Support Settings.
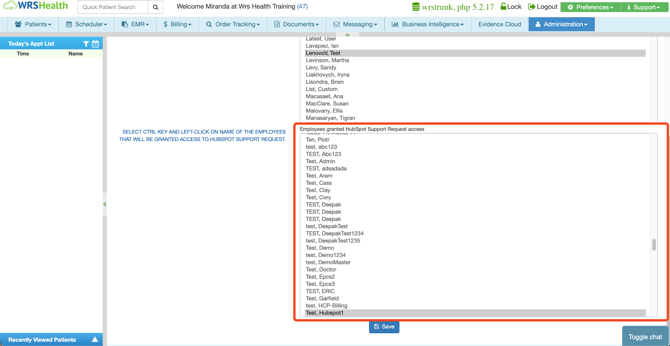
4. Click Save.
The EHR Tickets Page
The Tickets page of the EHR is where you can file a ticket to support and receive quick resolutions for EHR issues.
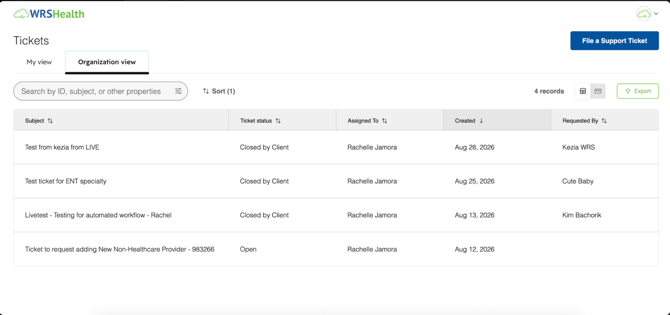
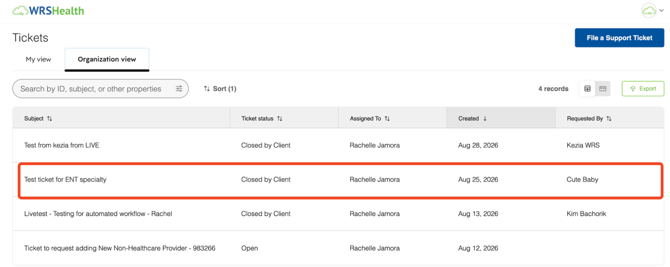
The Tickets page has two main tabs: My View and Organization View.
- My View. The My View tab displays the support requests or tickets that you have filed including their details such as status, assignment, creation date, and request ownership.
- Organization View. The Organization View tab displays all the support requests or tickets that your organization has filed including their details such as status, assignment, creation date, and request ownership.
Top Bar

The Tickets page also has the following functionalities in the top bar:
- Search bar. Search for support tickets using ID, subject, and other properties using the smart Search bar.
- Sort. You can sort the list of tickets using different sort criteria that best help you organize ticket items.
- Number of records. The total number of tickets displayed is also displayed in the top bar.
- Table and List view. From the top bar, you can toggle between Table and List view.
- Export. Click the Export button to export ticket records
List Columns
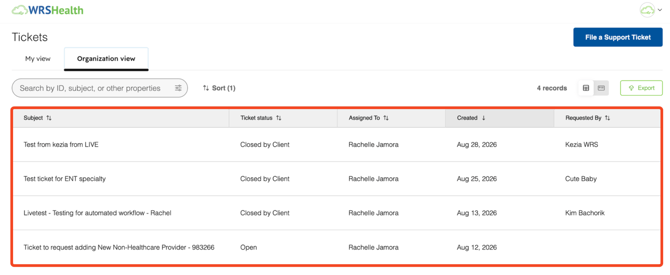
The tickets are listed along with relevant details that are organized in columns. The columns include the following:
- Subject. The Subject displays the topic or the subject of the issue.
- Ticket status. The Ticket status column displays the status of the request such as Open, In Progress, or Closed.
- Assigned To. The Assigned To column displays the name of the support person in which the ticket is assigned to. This person is the one responsible for resolving the issue.
- Created. The Created column displays the date when the support request was created or filed.
- Requested By. The Requested By column displays the name of the user that filed the support request.
How to File a Ticket
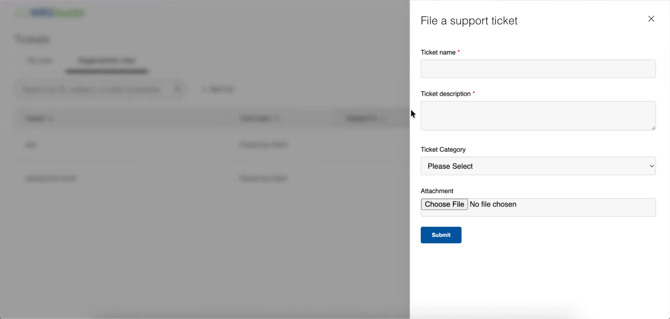
- From the Tickets page, click the File a Support Ticket.
- In the File a support ticket window, fill out the necessary information such as the ticket name, description, and category. You can include attachments if needed.
- Click Submit.
How to View Submitted Ticket Details
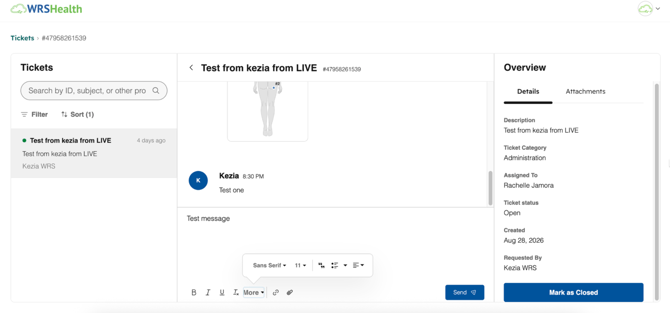
- From the Tickets page, search for and select the ticket name.
2. From the Conversations page, view the ticket details, support conversation, and attachments.
How to Mark a Ticket as Closed
When an issue is resolved, you can mark the ticket as closed. You can either do this or the support agent will do this on their end. When you or the agent closes a ticket, the system automatically syncs the status for both ends.
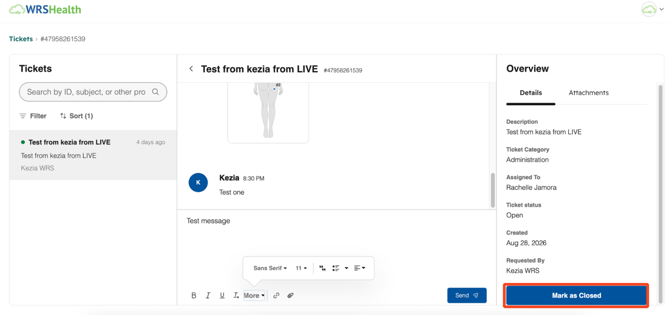
- From the Tickets page, search for and select the ticket name.
- From the Conversation view, click the Mark as Closed button.
Note:
Closed tickets no longer allow you to reply to the conversation. You can contact support to open the closed ticket on their end. You must file a new ticket for new issues.