Go to
From your Hubspot account, go to CRM and select Tickets.
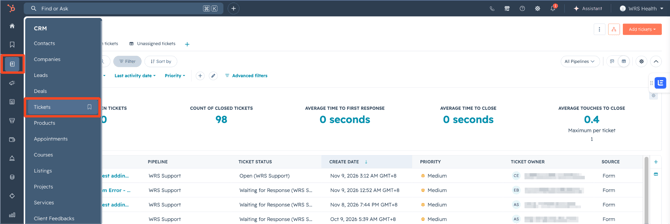
Hubspot Tickets
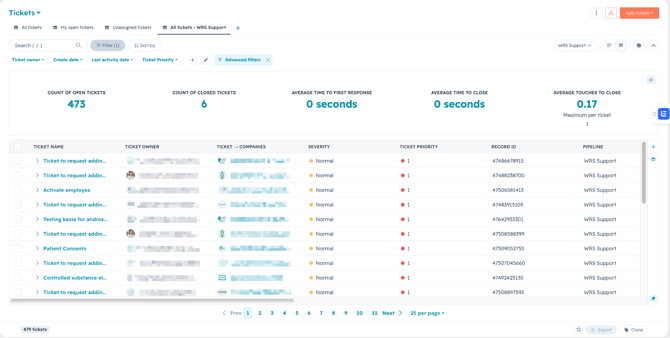
In the Tickets page, you can see the ticketing dashboard. The dashboard is divided into two main sections: the top and bottom part.
Top part of the dashboard
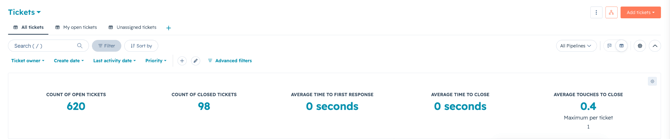
The top part of the dashboard contains the following functionalities:
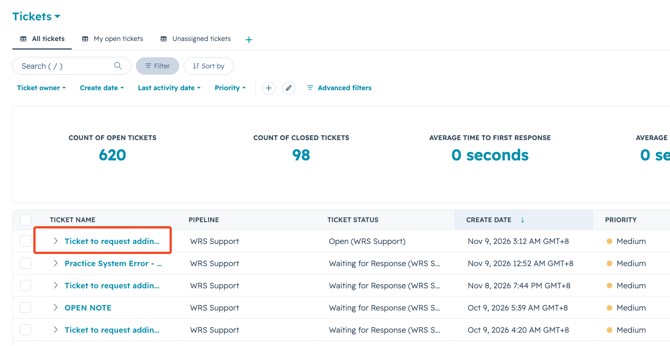
- All Tickets. Select the All Tickets tab to view the list of all tickets in the pipeline.
- My open tickets. Select the My open tickets tab to view the list of open tickets that are assigned to you.
- Unassigned Tickets. Select the Unassigned Tickets tab to view the tickets that are not yet assigned to any particular person.
- Search bar. Enter and search for the ticket name from the Search bar.
- Filter. Click the Filter button to expand the filter criteria where you can filter the list by Ticket owner, Create date, Last activity date, Priotity, and Advanced filter.
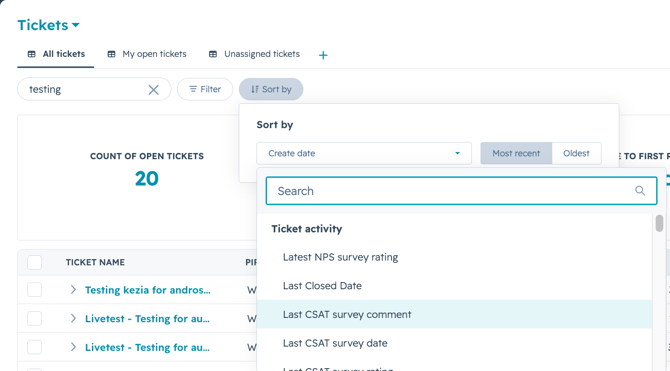
- Sort by. Click the Sort by button to open the Sort by dropdown list where you can select the sorting criteria.
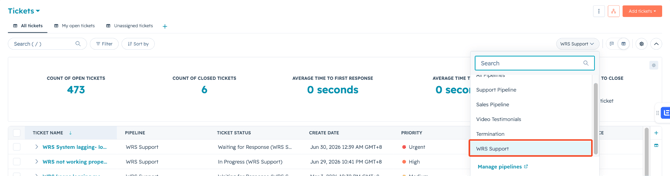
- Select pipeline. Select the applicable pipeline from the All Pipelines dropdown menu. Select WRS Support to view tickets from the EHR.
- Select Table or Board view. Switch between Table and Board using the toggle button.

- Statistics. You can also see the ticketing system summary by the numbers.

- Upper-right part. In the upper-right part of the dashboard, you can view three buttons. Depending on your access permission, you can click the ellipsis
 button to manage the dashboard, or the automate
  button to automate the tickets, or the Add tickets
  button .
Bottom part of the dashboard
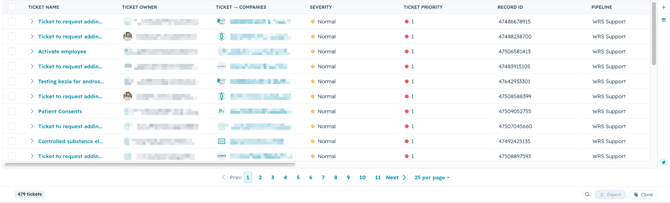
The bottom part of the dashboard contains the lists of the tickets and the corresponding columns:
- Ticket Name. The Ticket Name contains the name of the ticket.
- Ticket Owner. The Ticket Owner is the person whom the ticket is automatically assigned to.
- Ticket Companies. The Ticket Companies displays the name of the practice the ticket is requested from.
- Severity. The Severity column shows whether the issue is Normal, Medium, or High severity.
- Ticket Priority. The Ticket Priority column shows the urgency of the fix whether low, medium or high.
- Record ID. The Record ID is the unique ticket identifier.
- Pipeline. The Pipeline shows where the request stands.
- Ticket Category. Ticket Category determines whether the ticket is an EMR, EHR, Billing, or Administration issue.
- Ticket Status. The Ticket Status shows whether the ticket is a new request, waiting for a response, open, in progress or resolved.
- Create Date. The Create Date shows the date when the request was created by the customer.
- Source. The Source shows whether the ticket is created from a form, an email, chat, or a call.
- Last Activity Date. The Last Activity Date is the most recent date and time when a user, customer, or record had an interaction or task logged for the corresponding ticket.
- Bottom bar and dock. At the bottom bar, you can see the page navigation, the total number of tickets, the Refresh
 icon, and the Export and Clone buttons.

Opening and Viewing a Ticket
|
|
|
|
Managing a Ticket
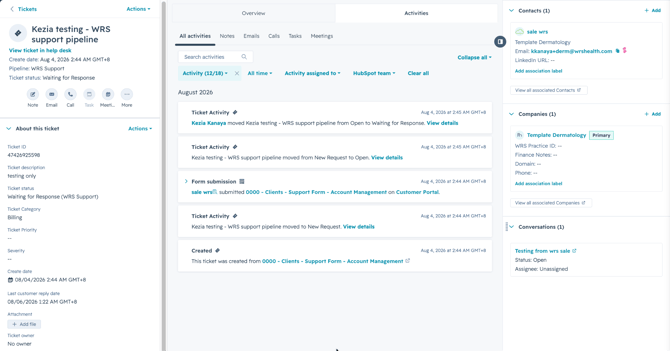
After opening a ticket, you can select from multiple ways to manage and resolve the ticket. Depending on the client’s needs, you can email the customer, make a phone call, schedule a meeting, or create a note or task for yourself.
How to Send an Email About a Ticket
- From the Tickets page, search for and select the ticket name.
- From the ticket details, click the Email button.
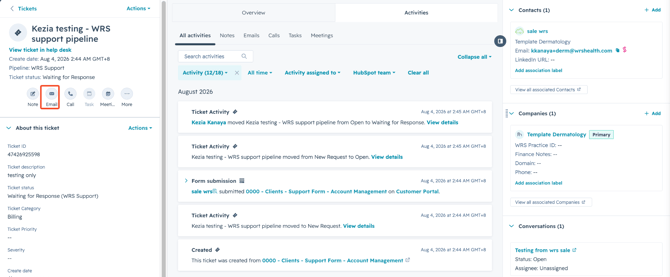
- Enter the necessary information in the Email box, and click Send. This will send a new email to the customer. To reply to a previous email, search for and select the email thread from Activities, and click Reply from the thread.
How to Call a Client About a Ticket
- From the Tickets page, search for and select the ticket name.
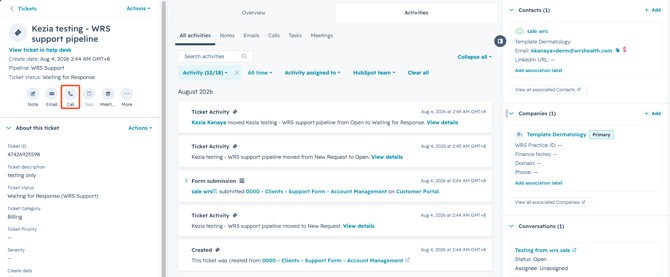
- From the ticket details, click the Call button to make a phone call to the client.
How to Set Up a Client Meeting About a Ticket
- From the Tickets page, search for and select the ticket name.
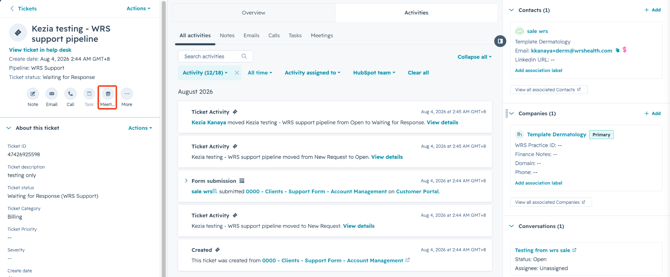
- From the ticket details, click the Meeting button. This opens your Google calendar where you can select the time and date of the meeting accordingly. The schedule is automatically synced into your Google calendar.
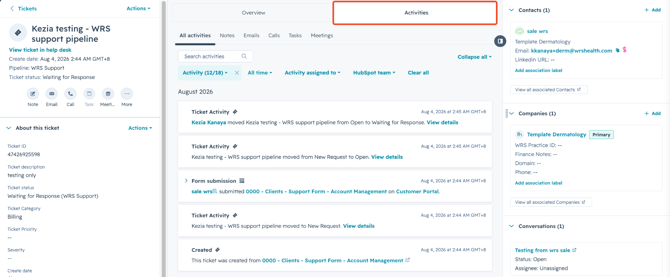
How to View Ticket Activities
- From the Tickets page, search for and select the ticket name.
- From the ticket details, click the Activities tab.
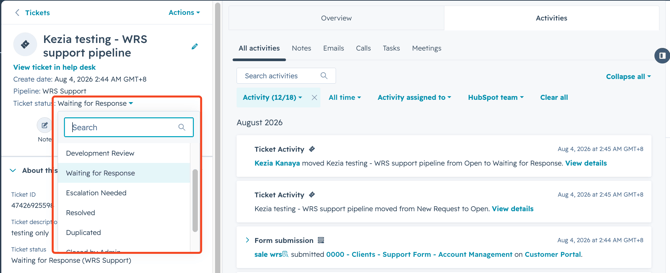
How to Update a Ticket Status
- From the Tickets page, search for and select the ticket name.
- From the ticket details, click the Ticket status dropdown list and select the updated ticket status.
Replying from a Conversation
To resolve an issue with a client, it is important to reply through the existing conversation. This ensures continuity and keeps all messages in one place. This helps you track past talks, maintain context, and build a strong client relationship without repeating information.
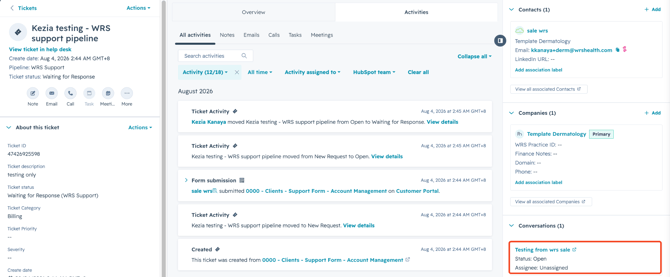
To view an ongoing conversation:
- From the Tickets page, search for and select the ticket name.
- In the Conversations section, click the conversation item. This opens a new tab where you can view the ongoing conversation with the customer.
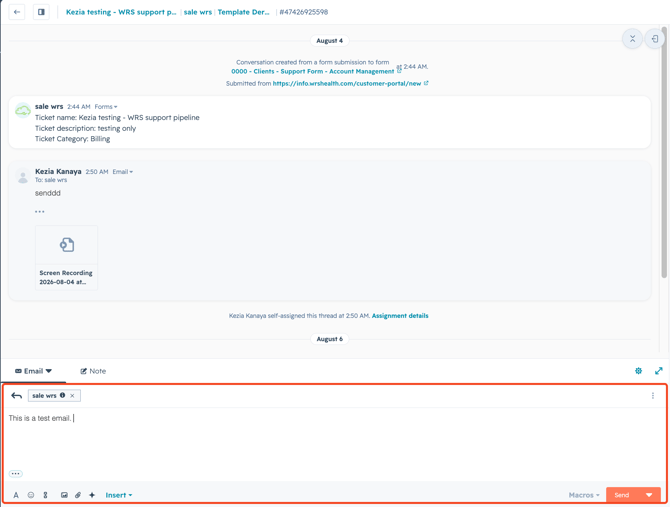
- From the conversation page, you can attach a link, an image, and a file along with your reply.
How to View Attachments in the Conversation
To view an attachment from a conversation:
- From the Tickets page, search for and select the ticket name.
- In the Conversations section, click the conversation item. This opens a new tab where you can view the ongoing conversation with the customer.
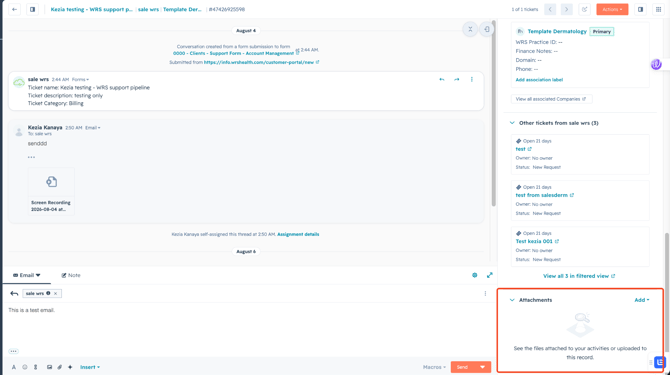
- In the conversations page, scroll to the lowermost section of the right pane where you can view the attachments you have sent and received from the customer.
How to Update a Ticket Status Within the Conversation
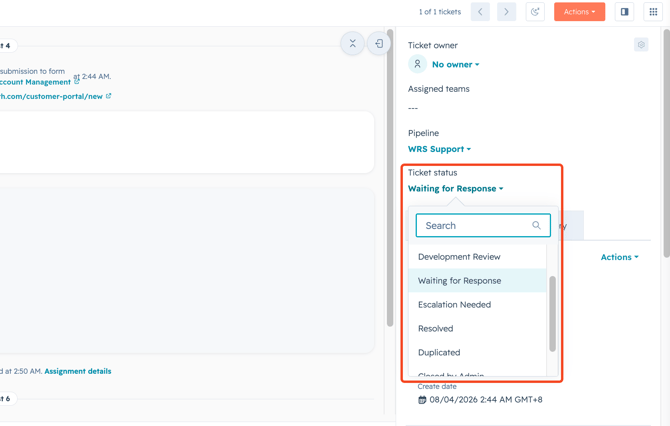
When a ticket is resolved, you can change the ticket status within the conversation.
- From the Tickets page, search for and select the ticket name.
- In the Conversations section, click the conversation item. This opens a new tab where you can view the ongoing conversation with the customer.
- In the right panel of the conversations page, click the Ticket status dropdown and select the new ticket status from the list.
Starting a New Conversation
If a client does not reply to a ticket, a conversation does not appear within the ticket details page. To start a conversation with a client:
- From the Tickets page, search for and select the ticket name.
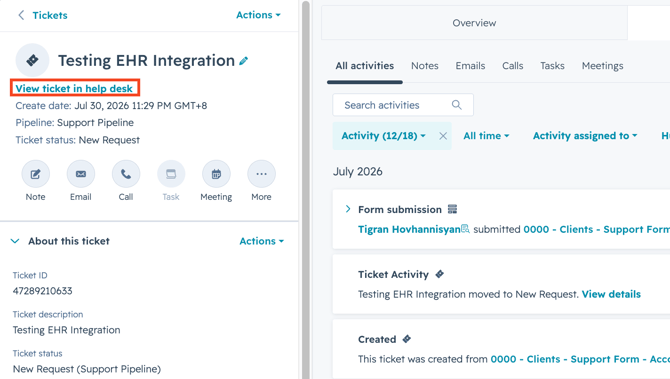
- In the ticket details page, click View ticket in help desk. This opens the conversation page where you can send a message to the client, send and view attachments, and update the ticket status.
Creating a Ticket Manually
If a client does not submit a ticket through the EHR form, they can also submit through email and calls. You can log these requests manually into the Hubspot ticket system using the Add tickets button.
- In the upper-right corner of the Tickets page, click Add tickets, and then select Create new.

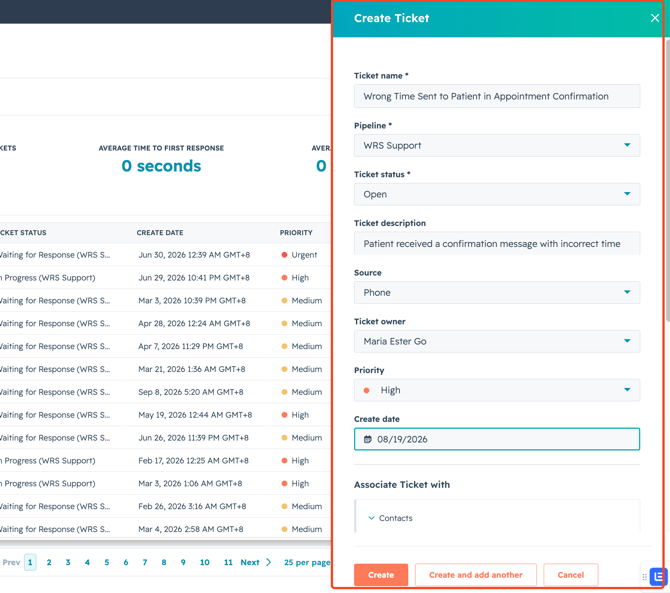
- Fill out the Create Ticket form accordingly and click Create.